
The typical air-cooled piston aircraft engine powering personal airplanes employs a carburetor to meter the fuel and air entering combustion chambers before it’s ignited. The devices are relatively simple and well-understood, with roots going back to the first internal combustion engines. But almost since the beginning of heavier-than-air flight, carburetor icing has been an operational consideration associated with mysterious engine failures or interruptions of power.
Enter the carburetor heat system, which has been recognized as necessary equipment aboard aircraft with carbs since those early days. To prevent carb ice—or melt it when it occurs—these systems must be fully operational for every flight. Naturally, this requirement demands proper maintenance.
Carburetor Theory
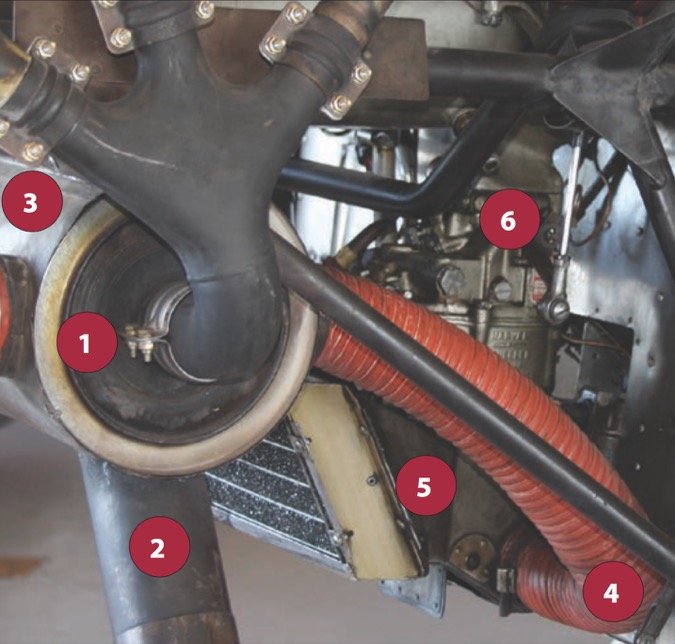
For our discussion, the generic carburetor incorporates the following major components depicted in the image at right left: 1) fuel discharge nozzle (jet); 2) venturi; 3) throttle plate. While critical to the carb’s proper operation, this design promotes carburetor icing, because the vaporization of fuel from the discharge nozzle along with the pressure drop in the venturi causes a reduction in temperature.
This temperature reduction varies depending on factors such as the power setting and type of fuel being used. If there is sufficient water vapor in the air and it is cooled to water’s freezing point, then ice forms in the venturi and throttle butterfly. It is generally accepted that outside air temperatures in the 50-to-60-plus Fahrenheit range and at least 60-percent humidity are ideal conditions for carburetor icing.
While these numbers reflect the most ideal conditions for formation, ice can form any time there is sufficient water vapor in the air. That’s because the temperature of the throttle butterfly and associated metal parts can be below freezing in normal operation. Once moisture-laden air makes contact with these cool parts, ice forms.
When ice forms, it will have an immediate effect on the engine as it begins blocking the fuel/air mixture’s flow to the engine. Also, ice can accrete on the throttle plate, causing the throttle to lock in a mostly closed position and causing at least partial engine failure. With the changes of altitude, temperature and power settings during a typical flight, there are multiple opportunities for carburetor icing to go undetected until engine power output is severely compromised.
Indications your engine’s carburetor is experiencing icing can include a decrease in engine rpm (fixed-pitch prop) or manifold pressure (constant-speed prop) when operating at a fixed throttle setting. Backfiring or a rough-running engine can follow. When operating without the benefit of a carb temp gauge, full carb heat should be routinely used if ice is suspected. In the case of severe icing or an extremely rough-running engine, it may be necessary to operate at a partial heat setting, gradually feeding in full heat to reduce rough engine operation and prevent rapid ice melting (liquid water) and a total engine failure.
Carb Heat Systems

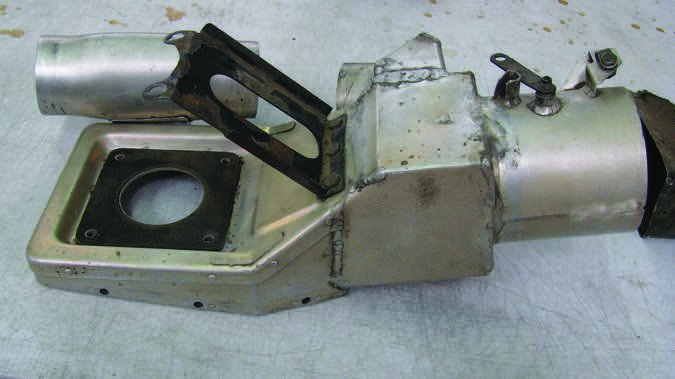
Carburetor heaters operate through an air box that normally uses filtered ram air to supply the engine’s intake system. A diverter valve or flap like a throttle butterfly is used to select hot air drawn from the exhaust manifold heat shroud instead of filtered, unheated air. Aircraft installations have an exhaust manifold heat shroud—pictured in the images at right—ensuring sufficient heat is available to provide hot air to the engine air inlet.
Some systems have high-capacity heat available, so a carburetor heat temperature gauge is standard equipment provided by the airframe manufacturer to allow temperature to be monitored and regulated by the pilot. It is the airframe manufacturer that has tested the system and supplied the necessary shrouds and heat capacity for all conditions that can be expected for the aircraft and engine.
It is important to inspect each system as an individual unit rather than to compare systems utilized on similar aircraft and allow it to be degraded because it looks like another one. Close, detailed examination can be necessary to ensure the exhaust system and internal baffling are in airworthy condition and can provide sufficient heat. Any defects in the exhaust system such as leaks, cracks, loose or missing hardware and broken or missing internal baffling could compromise the entire carb heat system as well as proper operation of the engine.

While it is standard procedure to carefully examine cabin-heat shrouds, ducting and valves during scheduled inspections, they often are completely overlooked when we preflight. Things to look for include holes in ducting or hoses, rodent nests, separation of liners and unobstructed drain holes. More than a few aircraft have had to be force-landed because of separated inner lining or ice in ducting or that gets melted by hot air and ingested into the engine.
Repairs to SCAT or SCEET tubing such as duct tape, glue or fabric patches should never be used inside or on an engine inlet duct of any type. Not only is there a potential for this material to be ingested by the engine, a backfire could result. If the duct is bad, replace or repair it using specific instructions appropriate to the aircraft and application.
A Rough Life
Carburetor heat systems live in extreme conditions. Stand back and take a good look at the carb heat box installation when the cowling is off the aircraft. The box is quite a distance from the horizontal centerline of the engine, meaning that normal power pulses and minor vibrations are amplified. Cracking and failure of the heat box can follow.
At the airbox itself, a butterfly valve normally in the cold position (carb heat off) is controlled by the pilot via a push-pull cable. The normal/off position allows for full filtered air during flight or ground operations. Early carb heat boxes had brass bushings on the butterfly valve’s pivot shaft. Lately, needle bearings are used, but are only a minor improvement in longevity.
When inspecting, repairing or assembling air boxes, it’s critical the carb heat control doesn’t interfere with other components and that it can be operated smoothly and accurately through its full range of motion with the control in the cockpit.
Inspection and repair
Without specific manufacturer instructions on repair and inspection of carburetor heat boxes, it’s necessary to refer to the FAA’s standard maintenance guidance—Advisory Circular AC 43.13—for general inspection and repair instructions. Common problems include cracks in the sheet metal structure, broken or missing screws or rivets used in previous repairs, and worn bushings or bearings. Check carefully for loose fasteners and replace them as necessary. Even one rivet or screw loose in the induction system can damage the engine and ruin your day. Do not use fiber locknuts on or in a carburetor heat box as this kind of hardware does not meet the heat-resistance requirements.
Even if you could find a new airbox for your 30-year-old airplane, its price may make repairs more necessary than ever. While your friendly neighborhood A&P mechanic can do most repairs—installing patches in cracked sheet metal, replacing bearings and shafts—sometimes it is money well-spent to have a repair station rebuild the complete unit. Along the way, you may find there are some parts that cannot be easily duplicated or repaired.
Airbox Care and Feeding
Presuming the heat shroud and ducting are in good condition, the other major component of a carb heat system is the airbox itself. It routes filtered air to the carburetor and uses unfiltered, heated air when the carb heat control is activated. Airboxes are used on fuel-injected aircraft, also, and can be just as prone to neglected maintenance.
Over the years, I have seen many aircraft engine pistons featuring indentations from screws, nuts and sheet metal parts that got into the induction system, rattled around in a cylinder and then exited via the exhaust. Some of these parts, in fact, embedded themselves into the piston. It’s almost a certainty they came from the induction system or carburetor air box.
In one case, a fuel-injected aircraft could develop only partial power and was forced down because induction air duct sheet metal parts were ingested into the engine and shorted out multiple spark plugs. Strange things can happen and Murphy’s Law remains in effect.
During an annual inspection, I once discovered a carburetor heat butterfly valve attachment had failed and was stuck in the hot-air position. The aircraft owner was surprised when I told him but afterward remarked that the aircraft’s performance had noticeably suffered on recent flights.
With these maintenance failures in mind, it is extremely important that carburetor heat or alternate air be checked on every pre-takeoff runup to ensure the airbox in fact is operating correctly. Also important to understand is that heated air can significantly reduce detonation margins in some high-performance engines. Under certain circumstances such as extremely hot outside air temperatures and high power settings, the use of carburetor heat/alternate air or malfunctions could cause a serious engine problem.
Using Carb Heat
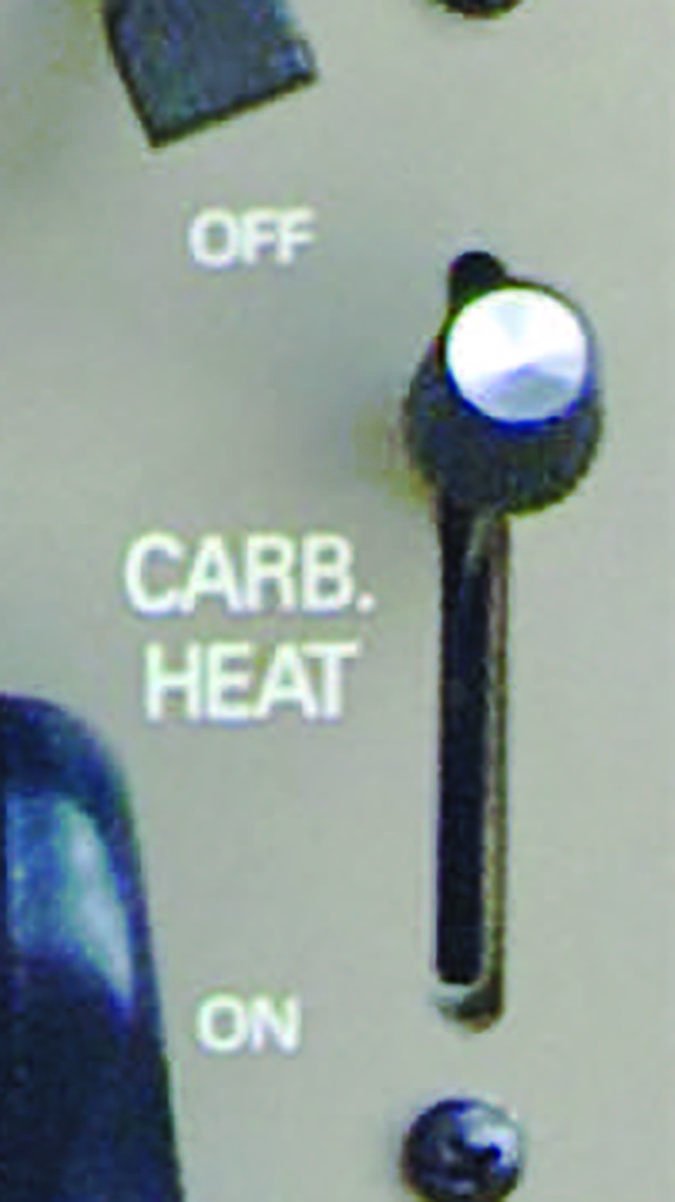
If you fly an aircraft equipped with a float-type carburetor, you have a cabin control used to apply carb heat. Since the mid-1970s, carbureted Piper Cherokees (most fixed-gear PA-28 models) mount the control to the right of the power quadrant, as shown at right. Popular late-model carbureted Cessnas mount the carb heat knob just left of the throttle.
Regardless of what carbureted aircraft you fly, applying carb heat usually is a checklist item during runup and at low power settings, like when landing or practicing engine-out landings. But there are other times you may want to apply carb heat, like when the engine is running rough. Consider these recommendations when you need to apply carb heat:
– Always apply full heat first. This will ensure any ice is melted as soon as possible.
– When adding full throttle, leave carb heat applied until you’re sure the engine is developing full power, then turn it off.
– When continuous carb heat is needed, find the partial-heat setting that works best for conditions, then leave it alone.
– Lean the mixture to accommodate the warmer, thinner air and conserve fuel if carb heat is necessary at cruise power settings.
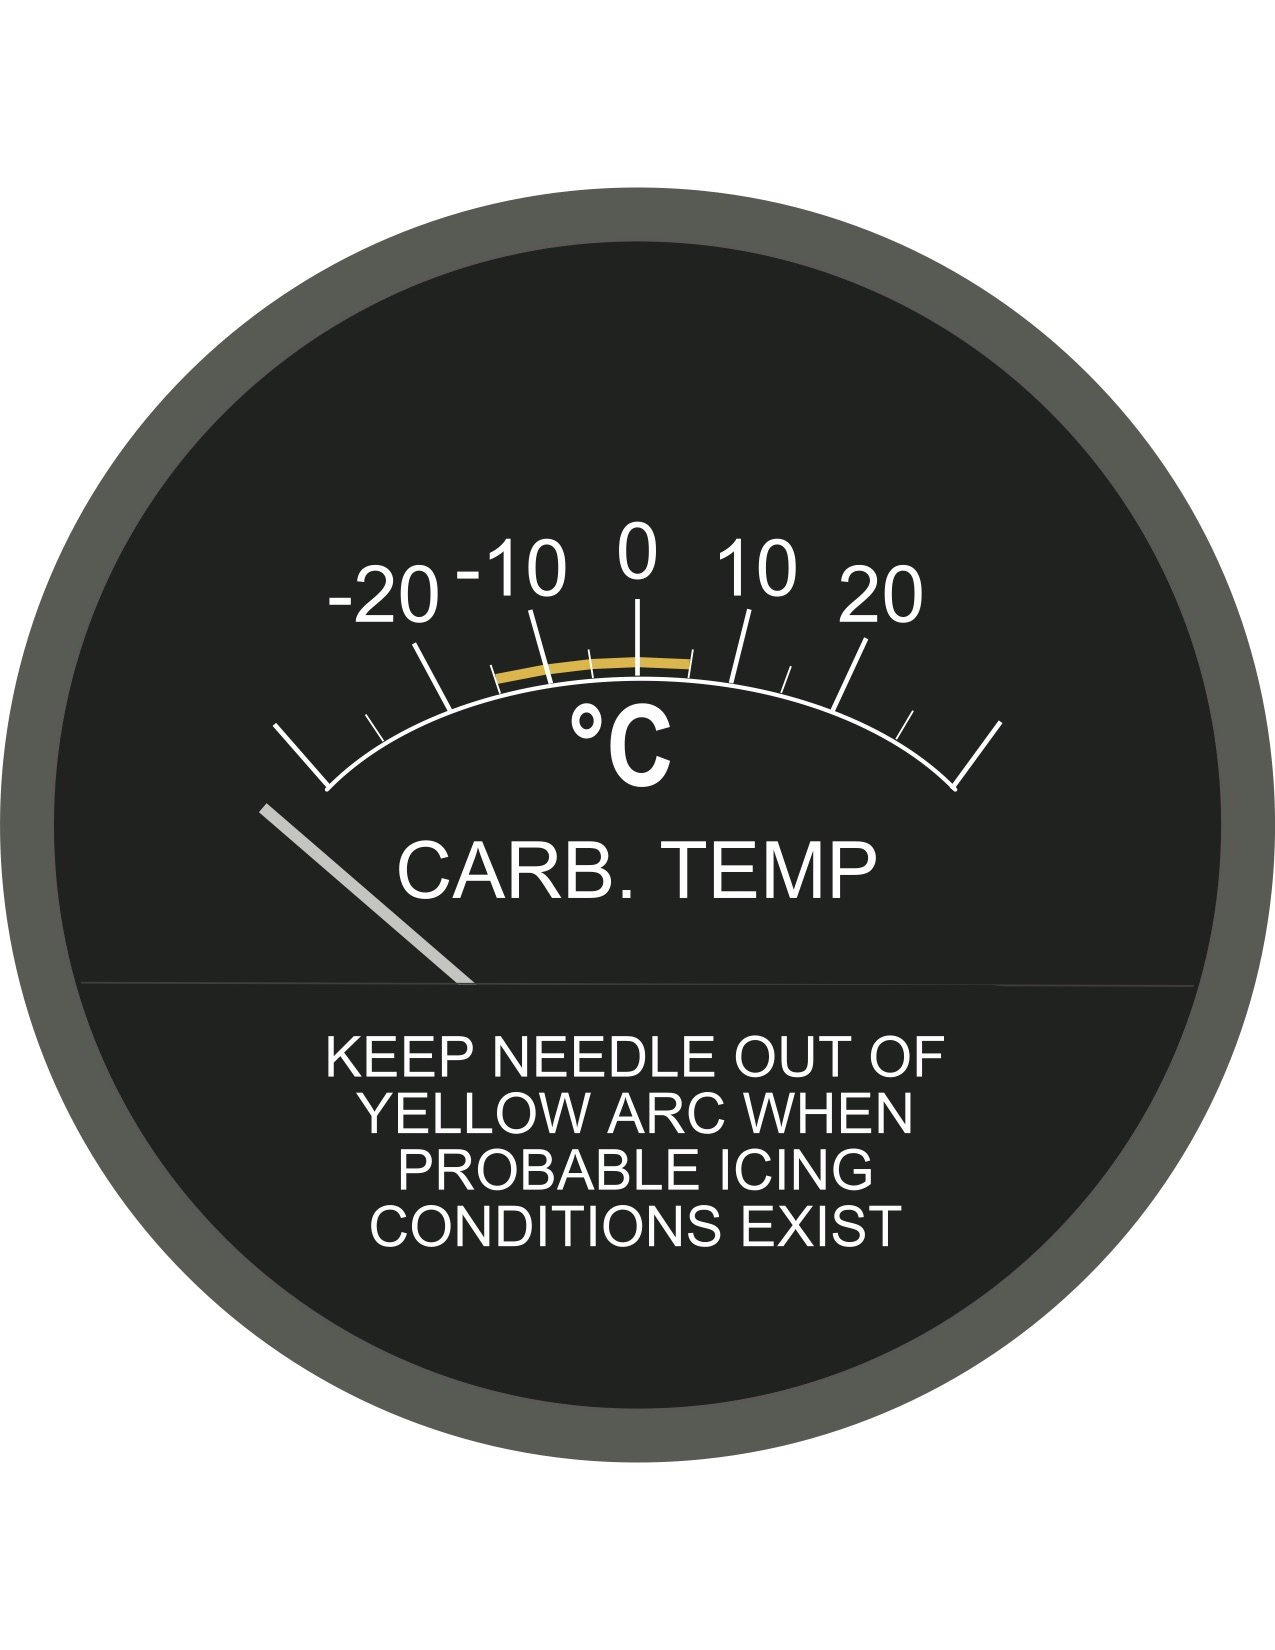
– Consider installing and using a carb temp gauge like the one pictured to prevent carburetor icing. — J.B.
Final Thoughts
To do their job, carburetor heat systems must be well-maintained and functional. But pilots also need to use them correctly, and understand what’s going on when they do. For example, carb-heated air is unfiltered, so we should use it sparingly on the ground—runups-only might be a good policy.
Another item many pilots may forget is that applying carb heat enrichens the mixture of fuel and air entering the engine. The heated air is less dense than it would be at ambient temperature, the one you used to set power and the mixture control. Now the engine is running slightly richer than it had been set, which translates to greater-than-necessary fuel consumption. It’s best to re-lean the mixture after establishing your preferred carb heat setting if it looks like you’ll be using it in cruise flight.
Also, it can be important to always use carb heat well in advance of engine power reductions, such as when doing extended low-power glides, when practicing engine-out approaches and landings, or even when preparing to land. Clear the engine often while at low power settings to ensure the carburetor heat system is supplying sufficiently heated air and that the engine is still responding to throttle input. When repairs are necessary, don’t defer them, but correct the problem before the next flight.
Mike Berry is a 17,000-hour airline transport pilot, is type rated in the B727 and B757, and holds an A&P ticket with inspection authorization.


