
An airplane will seek the indicated airspeed for which it is trimmed. We might call this “the principle of trim,” and it is the basis for pitch stability and airplane control. If you understand this basis, you can predict an airplane’s response to just about any change in power, control input, autopilot command and even wind shear.
We all should know by now to adjust attitude with the pitch control, then trim off the pressure so the elevator stays where you want. But according to the NTSB, the most common fatal crash scenario directly results from inadequate pilot knowledge of and response (or lack of response) to the principle of trim. What is this principle of trim? How can we use this understanding to anticipate airplane control requirements, and to avoid the most frequent cause of fatal accidents?
Not Primary
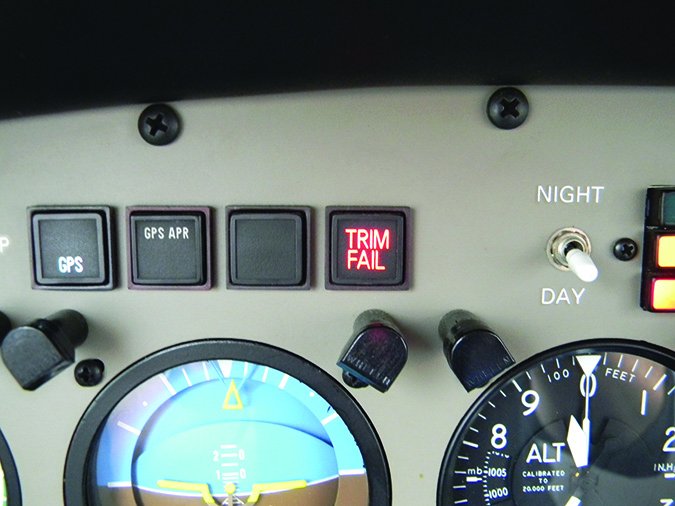
An airplane’s pitch trim system is considered a secondary flight control. Other secondary controls include flaps, spoilers and wing leading edge devices. Of these, the pitch trim system is of special importance because its proper (or improper) setting has a direct impact on the operation of the primary flight controls: the elevator, aileron and rudder. For our purposes, we’ll focus on elevator trim (or pitch control, depending on the airplane’s configuration).
Like any other control surface, a trim tab does its job based on the airflow across it. Increase the air flow and it will have greater authority—it will exert greater force on the primary control surface. Decrease the airflow and the tab has less authority, moving the primary control surface less. Changing the power setting, or adding or reducing drag (changing flaps and retractable landing gear position), changes the airflow across the trim tabs, driving a performance change.
When flying a conventional single, adding power causes more airflow over the trim tabs, making the trim “think” the airplane is flying faster. Hence most airplanes will pitch up with power applications, and conversely will pitch down with power reductions. Twin-engine airplanes can put a great deal more wind over the tail, so a pitch change following a power adjustment may be even more dramatic. The T-tail craze of the late 1970s, which continues among some designers and their airplanes, was a successful attempt to reduce the natural response to power changes by getting the elevator and its trim tabs up and out of the propeller blast.
To better understand the principle of trim and the way it affects your flying, let’s look at how it applies to various flight regimes and scenarios.
Takeoff Trim
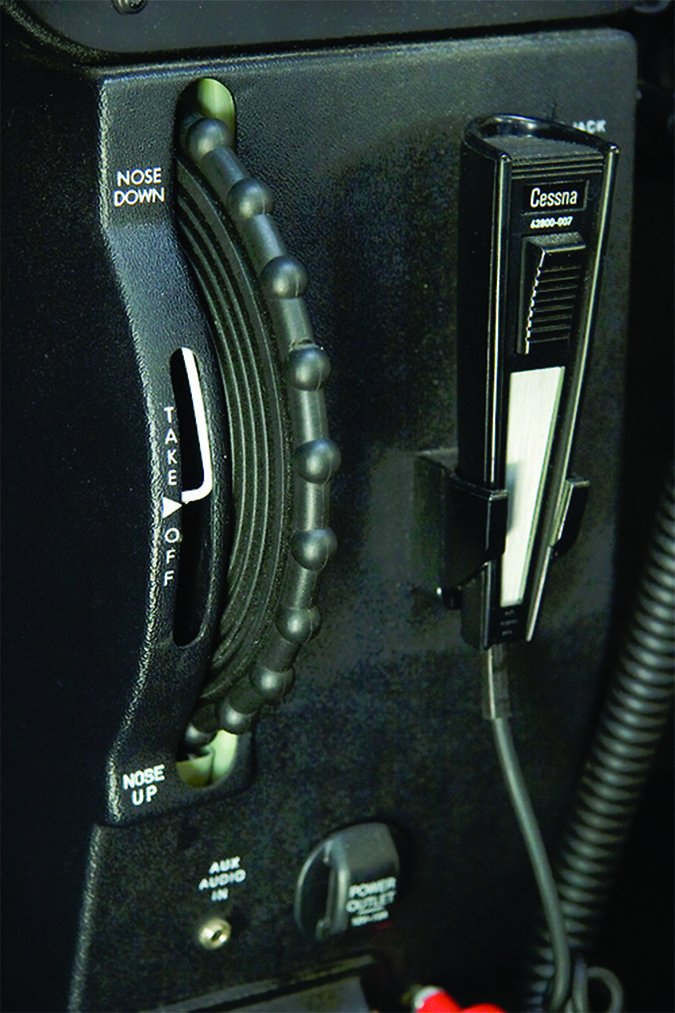
The one time most Pilot’s Operating Handbooks (POHs) or other manuals specify a specific trim setting is at takeoff. The relevant checklist will direct your attention to some sort of mark or pointer indicating the pitch trim is set appropriately before takeoff. What does the takeoff trim setting give you?
The purpose of the takeoff trim setting is to roughly trim the airplane for a specific performance speed immediately after takeoff. In many light airplanes, the takeoff trim setting approximates “hands off” flying at VX speed in the takeoff configuration (flaps for takeoff; gear down in retractable gear airplanes). In other airplanes, it sets approximately VY. With the trim set for takeoff, relative wind from the forward speed in a normal liftoff—plus whatever propeller blast flows over the tail—equals enough trim control force to move the elevator to approximately what it takes to achieve the VX or VY position with little manual force from the pilot. You guide the liftoff, to be sure, but the airplane will tend to attain that attitude on its own with the recommended trim setting. Often this effect is temporary, i.e., with the trim set for takeoff, the airplane will not remain at the VX or VY speed after liftoff. Instead, it will be accelerating through this speed as it climbs through the 50-foot height of the FAA’s mythical obstacle called out on takeoff performance charts.
For example, when I take off in a 300-hp Beech A36 Bonanza with flaps up, if I smartly rotate at the book liftoff speed, the takeoff trim setting causes the airplane to be accelerating through VX almost immediately, 50 feet above the runway. If I have a taller obstacle further out and need to maintain a VX climb longer, I’ll need to increase back pressure slightly to maintain VX in the initial climb. With the trim properly set for takeoff, however, I know the airplane will do pretty much what I want it to do initially after liftoff.
Note this is independent of density altitude. Airplane performance, including trim function, is a function of indicated airspeed. Indicated speeds for desired performance don’t change with density altitude; it just takes a longer or faster run to get to a given indicated airspeed when the air is less dense.
Climb and Cruise Trim
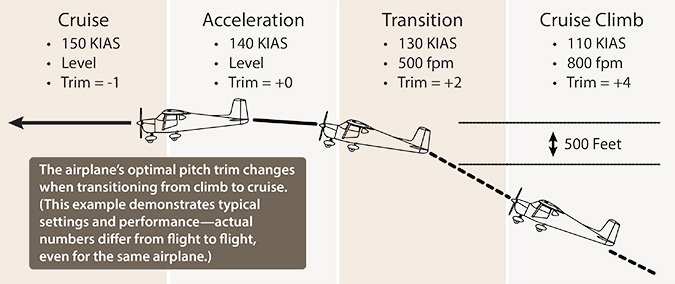
Your trim setting in climb is highly dependent upon the density altitude, the power setting and the rate of climb you use. Whatever speed for which you trim in climb, however, except for in the lowest-powered training airplanes there will be a large difference between the cruise-climb indicated airspeed and the indicated speed in cruise flight. This brings me to something I find to be little understood among even experienced pilots, but that has a significant impact on precision and the resulting performance when leveling off from climb into cruise: since you are trimming for an indicated airspeed, there will be a gradual but dynamic change in trim required to keep the airplane precisely on your desired altitude.
The diagram above illustrates how pitch trim settings can change during climb through the transition to level cruise flight. Cruise climb occurs at a target indicated airspeed, with a resulting trim setting. In most airplanes this will be a few degrees nose up on the trim indicator, if the indicator is calibrated in degrees or units of deflection from neutral, or at an identifiable number of “dots” or distance nose up from the takeoff setting in other airplanes.
Upon reaching your cruise altitude, lower the nose to level flight and allow the airplane to accelerate. As indicated airspeed increases, the airplane—following the principle of trim—will pitch up to try to slow down to the airspeed for which it is trimmed. You’ll have to apply nose-down pressure as speed builds, trimming off the pressure as you go. It won’t all happen at once…the airplane accelerates, you hold forward control pressure and trim a little nose down to relieve that pressure; the airplane accelerates some more, you hold more forward pressure and trim the nose down more; the airplane accelerates more yet and you hold more forward pressure and trim even more nose down…all the way until the airplane stabilizes on cruise indicated airspeed.
If you reduce power for cruise, you’ll need to trim the elevator up slightly to maintain level flight. The higher you fly, the lower your indicated airspeed will be (although your true airspeed may be higher), so the pitch trim setting in cruise flight will usually be more nose-up at higher altitudes and/or lower engine power. As fuel burns off, the center of gravity may change, requiring you to re-trim the airplane slightly. As you should know, if the airplane is trimmed for an indicated airspeed (IAS) slower than your current IAS, it will tend to nose up. If the airplane is trimmed for an IAS faster than your current IAS, it will tend to nose down.
500 FPM For The Last 500 Feet Of Climb
– It triggers you to being level-off actions early, to avoid climbing through your altitude;
– It begins the process of acceleration toward cruise speed sooner; and most importantly in the context of this discussion,
– It initiates the trim change from cruise climb speed to cruise speed, permitting you to make smaller trim changes a bit at a time instead of having to command a big trim change all at once.
Descent
Using trim makes it very easy to plan an en route descent: If you reduce power you’ll get a corresponding rate of descent, because the airplane will seek its trimmed airspeed. In many piston-powered light airplanes, changing manifold pressure by one inch will cause a roughly 100 fpm change in vertical speed.
If you’re flying an airplane with that characteristic, and want to descend at 500 fpm while maintain your current indicated airspeed, then reduce manifold pressure by five inches. The airplane will nose down to remain on speed, and by doing so it will make your desired descent. Adjust the throttle as needed to keep the manifold pressure constant during your descent and the vertical speed and IAS also will remain constant.
To level off, add power to return to the same setting it was at in cruise at the higher altitude. Following the principle of trim, the nose will come up to a level attitude and the airplane will fly level at the trimmed IAS. At most you may need to make very minor adjustments to the trim from this on-speed target.
Final Approach
On final approach with the runway in sight, you’ll usually extend full flaps and slow the airplane to final approach speed. With flap extension and power reduction, in most aircraft, you’ll need to re-trim the airplane nose up in order to maintain hands-off flying. In light training airplanes this often puts the trim approximately in the takeoff position. But in larger or heavier airplanes, especially those with long cabins and therefore wide ranges of possible CG loadings, the trim setting on final approach may be well outside the safe takeoff range.
For example, a Beech Bonanza’s takeoff trim-setting range may be from three to six degrees up, but if only the front seats are occupied and the pilot trims off pressure for final approach and during the flare, it will be at 19 to 21 degrees up at the point the wheels touch the pavement. Why is this important? Because it leads to one of the deadliest scenarios in aviation: the go-around.
Go Around
You’re coming down final approach. Flaps are full, retractable gear is down, and power is at its normal setting. Airspeed is spot on and you are trimmed, flying at a fairly high angle of attack. Suddenly a deer runs out onto the runway and you need to go around. Assume one of these two scenarios:
In your surprise at seeing the deer on the runway you instinctively pull back on the controls—what I call “the panic pull.” Airspeed declines and angle of attack increases. You then think about what you have done, and you add full throttle an instant later. The increase in power pitches the airplane’s nose even higher, increasing angle of attack to the critical point. If you don’t push the nose down now, hard, you may stall, with not enough altitude to recover.
When the deer runs onto the runway, you apply go-around power. This causes the airplane to pitch up. If you don’t push, hard, against the nose-up trim, the angle of attack may become critical, and the airplane may stall.
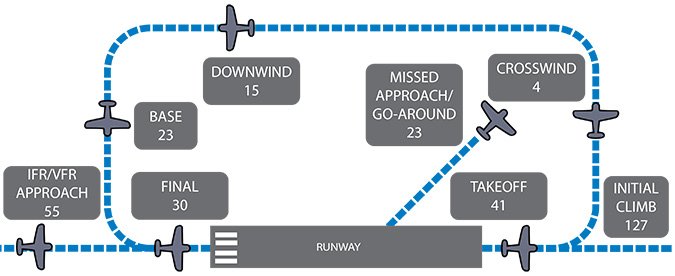
The NTSB tells us that loss of control accidents—mainly stalls—most frequently occur immediately after takeoff, during the first moments of a missed approach, or as the pilot is attempting a go-around (see the diagram above). These are all situations when the airplane’s trim is most likely to be set to a position for the previous phase of flight but which is not correct for the new one. It’s vital to know that, even if you perform a go-around correctly, you’ll probably need to push on the controls—hard—to avoid excessive pitch and angle of attack until you can re-trim.
We’re taught about trimming early in our flying career, and many of us get pretty good at using trim to fly accurately and smoothly. The deeper principles of trim operation to reduce workload, predict airplane performance and avoid the most common cause of fatal aviation crashes often isn’t taught at all.
Tom Turner is a CFII-MEI who frequently writes and lectures on aviation safety.


