

Last December 24th, a Cessna 340 crashed at Bartow, Fla., during an attempted predawn, IMC departure. All five aboard the airplane died. We don’t know yet what factors, if any, beside the weather may have contributed to this Christmas Eve tragedy. Regardless, the circumstances should remind us of the extra planning and skill needed for a departure into low IMC, day or night—even if everything is going right.
As a rule, we don’t spend much time training for and reviewing low-visibility takeoffs. During checkrides and recurrent training, we’re not evaluated on them and we don’t track our proficiency in low-vis departures by logging the number we fly or practice. Perhaps there should be a requirement to have some recent experience with them. But there isn’t, so when called upon to make such takeoff, we frequently have very little recent experience.
Unseen Hazards
Logically, if a pilot is IFR current and skilled, taking off into the murk (day or night) shouldn’t be any riskier than making an instrument approach. There are other hazards besides IMC itself, however, that pilots face when making a departure in IMC—threats that are limited to reduced visibility, but which are greatly magnified when the pilot’s visibility is restricted. Let’s look at four such hazards.
Getting up to speed: You might be tired and a little worn out by the time you begin an instrument approach at the end of a flight. But even if you are, you have plenty of time to get “into the groove” and prepare for a low-visibility arrival. That’s not the case with a low-visibility takeoff: You have no way of knowing for certain if you’re up to speed for an IMC departure until you’re actually in the air—when it’s too late to do anything about it. You’re in a high-workload condition, with the airplane fairly slow and at a high angle of attack, all while you are close to the ground. There isn’t any time to catch up before a low-visibility takeoff to get the feel for the airplane, or to detect and correct for any missed briefing or checklist items.
Checklists and performance: Similarly, the airplane may meet all airworthiness requirements and pass all preflight and before-takeoff checks, but it is only really put to the test when you take off. If you’ve missed an item (failed to set trim for takeoff, didn’t put the right ATC frequency in standby, etc.), you’ll find out soon enough. If there is anything that isn’t quite right (or worse) with the airplane or engine itself that is not immediately obvious during the run-up, this is when it will manifest itself.
Fatigue: The NTSB’s 2018 Most Wanted List calls for reducing fatigue-related accidents across all transportation modes, not just general aviation. Interestingly, the precise role of pilot fatigue in general aviation mishaps is a big unknown: the NTSB simply doesn’t have the time or resources to research the recent sleep history of most accident pilots, and even if they tried there may be little data to go on. Being tired and taking off into a 300-foot overcast with fog so thick you don’t want to taxi in it may, however, indicate fatigue-impaired judgment. It is certainly a factor to consider in all IMC departures.
False climb illusion: Compounding the challenge of low-visibility and sometimes high-workload departures is the somatogravic physiological hazard, also known as the “false climb” illusion, which the Flight Safety Foundation identifies as the result of fluid moving in a human’s inner ear when an aircraft—or anything, really—accelerates. Pilots sense this motion as a pitching movement upward—a false sensation of climbing. Without a good natural horizon and if inattentive to or distracted from the instruments, this sensation can cause a pilot to push forward on the pitch control to “recover” from the false climb. He/she forces the airplane downward because they think it is going up too steeply or too rapidly.
A simple, effective solution to the somatogravic reaction to acceleration is to trust your instruments, particularly those related to airspeed, pitch attitude and rate of climb. While directional control on and above the runway also must be priority, establishing and maintaining a positive rate of climb is a critical part of the zero-zero takeoff. Rate of climb, of course, can be a critical performance factor on any instrument takeoff and accompanying departure procedure.
A common personal minimum is to require weather to be at least at or above the departure airport’s circling minimums in order to take off. Most of the time this recommendation is used in the context of being able to return to the departure airport in the event of an abnormal or emergency condition shortly after takeoff. This self-imposed limitation, however, can also provide a greater margin to manage the risks of personal and airplane spool-up, fatigue management and the false-climb illusion.
Departure Control
Regardless of a pilot’s experience or training, here are some ways to maintain control during a low-visibility departure:
Checks and flows: Use checklists and cockpit flow checks like you were taking a type-rating checkride, every time you fly. Don’t take shortcuts—printed checklists and confirming visual checks are designed specifically to protect you when you are a little off your game and more likely to miss something. Fly like you train, and train like you fly.
Organize before you fly: Get everything set before you take off. Don’t think, “I’ll program the GPS or call up the en route chart on my mobile device once I’m in the air.” Don’t take the runway for departure until all the set-up work is done. And double-check the cabin door—this would be a bad time for it to pop open right after liftoff.
Brief the departure: Review the departure procedure and clearance with the same scrutiny you apply to an IFR approach. Brief yourself on the altitudes, headings and expected route. If you’re departing on vectors, know the approximate heading to your first expected fix, so when you’re cleared “direct to” or “own navigation,” the required turn is not a surprise. If you’re following a SID or an obstacle departure procedure, brief it and have it loaded into your nav system before you climb, just as you would brief an ILS approach before descending on the glideslope.
Fly what you briefed: “Plan your flight and fly your plan” works. Your plans might change. But vectors or updated clearances should be the only changes you need to process mentally—be prepared for everything else.
Sterilize the cockpit: Focus solely on the immediate task at hand when making a low-visibility departure. Don’t worry about extraneous details until you are trimmed in cruise climb and well away from the airport. There’s a case to be made for hand-flying the departure all the way to altitude—this keeps you more focused on the vital, immediate tasks of managing altitude, airspeed, heading and navigation in the initial phases of a low-visibility departure.
Our training, evaluation and rules for instrument currency all revolve around getting down from altitude. But taking off into murky skies shouldn’t result in a perfectly functioning aircraft impacting terrain, as it did in Bartow on Christmas Eve. That accident remains under investigation, and we’ll have additional details on it when the NTSB issues its probable cause finding.
In the meantime, plan and execute your low-visibility departures with the same care and diligence you apply to a low-minimums approach, with the added knowledge that you never know for certain how up-to-speed you and the airplane are until you’re already committed to flight. Exercise precise directional control on the runway, then establish and maintain a positive climb rate.
The Zero-Zero Takeoff
An old-school staple of instrument training is the simulated zero-zero (zero visibility, zero ceiling) takeoff. Line up precisely on the centerline of the runway, don the view limiting device (with your trusty CFII by your side, of course), ease in the throttle and keep the heading indicator locked on runway heading as you accelerate to liftoff speed and climb out. I remember doing this during my initial instrument rating training 30(!) years ago; my instructor had me do it on an IPC I flew late last year. It’s a great confidence builder, and in some ways is easier than making the transition from visual to instrument flight in the very early stages of departure.
One consideration is this task or technique is not required by the FAA’s instrument proficiency check requirements or the Airman Certification Standards on which the IPC is based. Although “departure procedures (DPs) and associated climb gradients” is a knowledge requirement (Area V Task B: Departure, En route and Arrival Procedures) in the instrument rating ACS, there is no specific requirement to fly an instrument departure, let alone a low-IFR takeoff, on the practical test or during an instrument proficiency check. Individual examiners and CFIIs might include a simulated low IFR or even a zero-zero takeoff on a flight check, but it is not required for a pilot to ever demonstrate this technique.
Meanwhile, the FAA’s Instrument Flying Handbook (IFH, FAA-H-8083-15B) offers formal guidance:
- This maneuver requires the pilot to maneuver the aircraft during the takeoff roll by reference to flight instruments alone with no outside visual reference. With practice, this maneuver becomes as routine as a standard-rate turn. The reason behind practicing instrument takeoffs is to reduce the disorientation that can occur during the transitional phase of quickly moving the eyes from the outside references inside to the flight instruments.

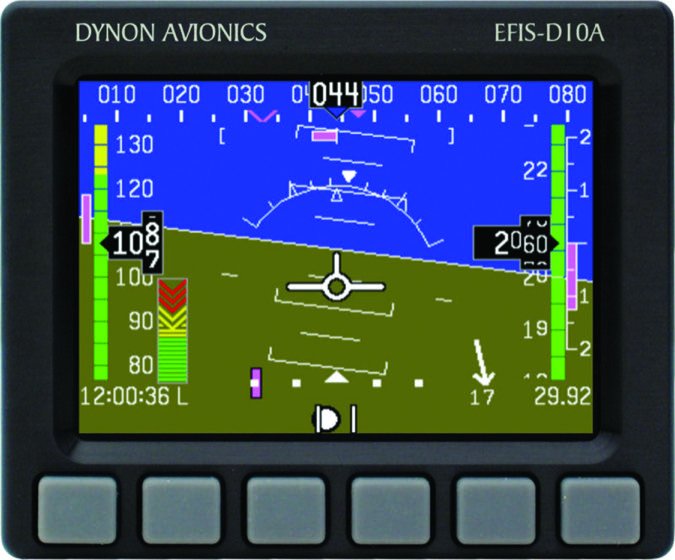
The IFH offers techniques for instrument takeoffs, both with traditional instrumentation and using synthetic vision on a primary flight display.
Ask your CFII to include simulated zero-zero takeoffs in your next recurrent training or IPC to be better prepared for takeoff off into IMC. Or maybe cross such maneuvers off your “can-do” list entirely.
Check It Out
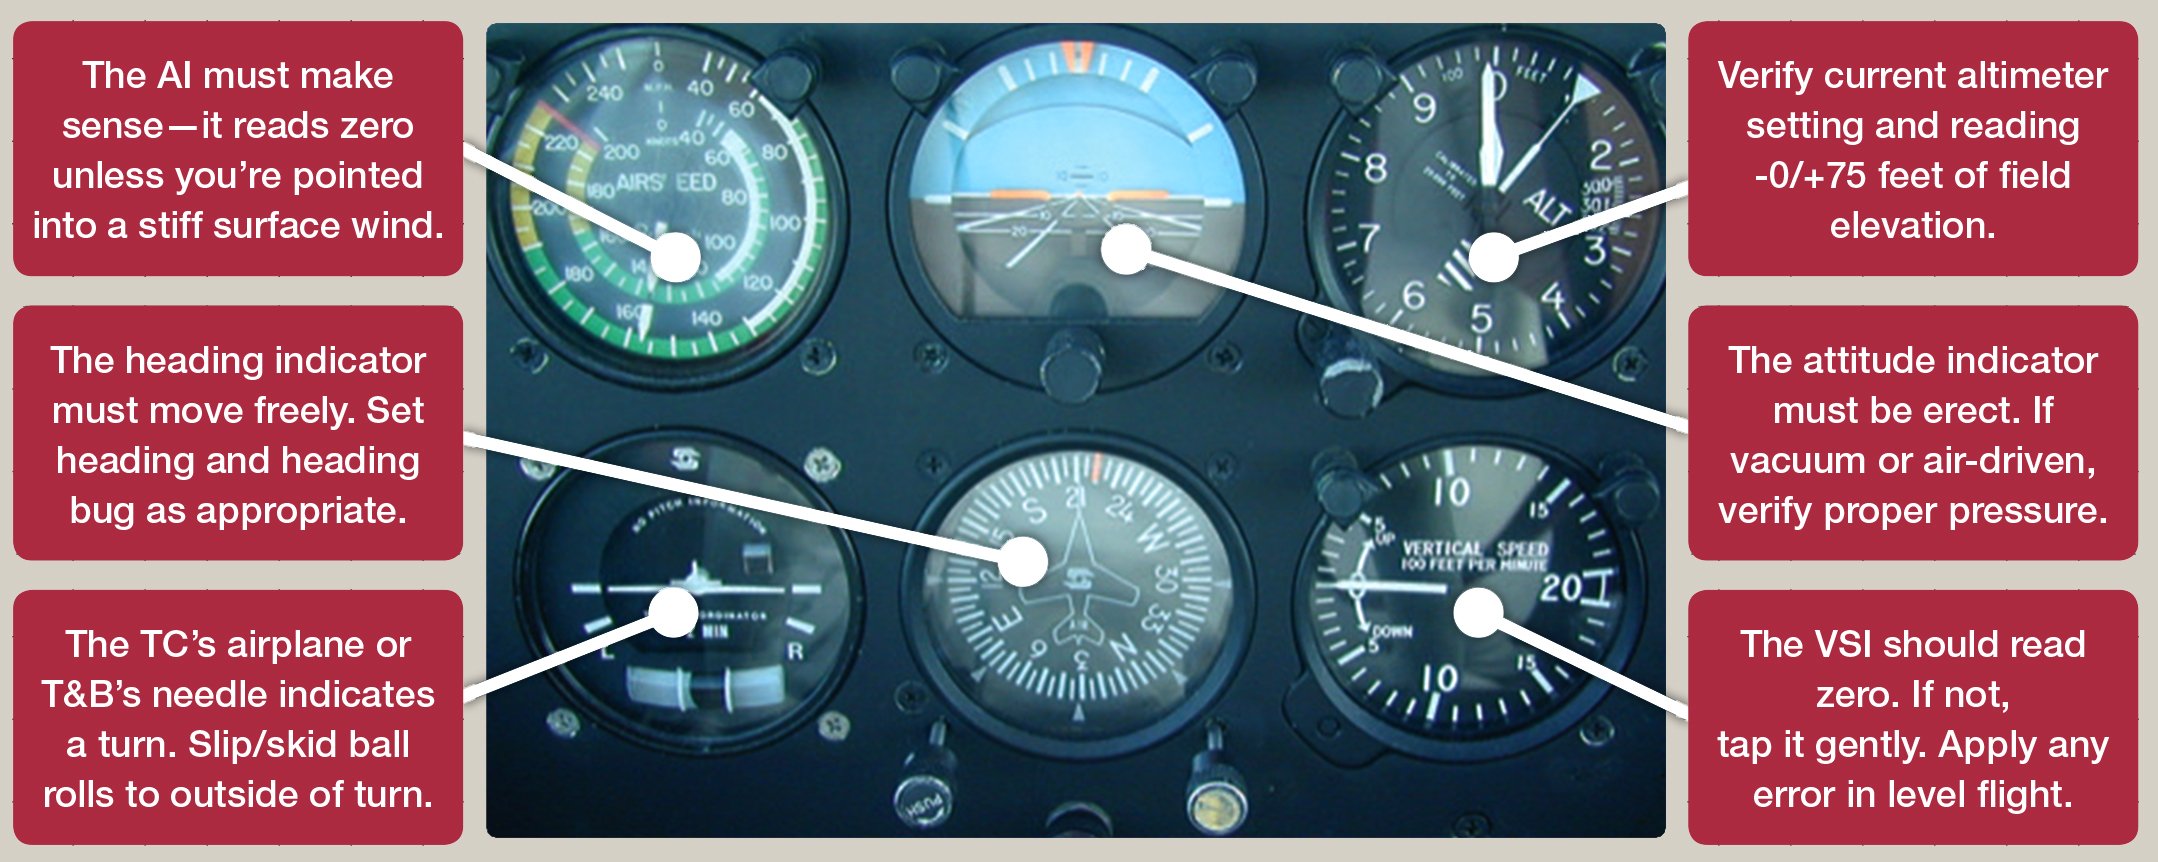
As an instrument instructor, I find pilots frequently become lax about the routine verification of instrument operation before takeoff. If upon reflection you find you’re among them, remember these vital IFR checks (from the FAA’s instrument rating airman certification standards:
- Perform preflight inspection by following the checklist appropriate to the aircraft and determine that the aircraft is in a condition for safe instrument flight, to include: communications equipment, navigation equipment, databases appropriate to the aircraft flown, magnetic compass, heading indicator, attitude indicator, altimeter, turn-and-bank indicator/turn coordinator, vertical speed indicator, airspeed indicator, clock, power source for gyro instruments, pitot heat, electronic flight instrument display, traffic awareness/warning/avoidance system, terrain awareness/warning/alert system, FMS and autopilot.
When you align with the runway for takeoff, ensure the heading indicator agrees with the charted runway heading.
If your flight instruments are driven by an attitude/heading reference system (AHRS), check that all the primary flight display (PFD) indications meet these same preflight criteria. Glass or steam-gauge, if any instrument does not perform as expected, taxi it back to the ramp and have the instruments checked before IFR flight.
All this sounds quite remedial, but my experience is that a lot of instrument pilots don’t routinely make these IFR instrument checks. But if you’re taking off into low clouds or reduced visibility, you need to be able to trust your instruments.
Finally, does your airplane have a flight director with a go-around (GA) or go-around/missed approach (GA/MA) button? If so, pressing it disengages the autopilot (if it’s on) and moves the flight director command bars to a wings-level, seven-to-10-degree nose-up attitude, which is close to optimal climb attitude for many airplanes. Why not use this to give you an attitude target for a low-visibility takeoff? Line up precisely on the runway, click the GA/MA button and confirm the flight director command bars rise up. When you raise the nose for takeoff, pitch to put the airplane symbol in the notch.
The Bartow Accident
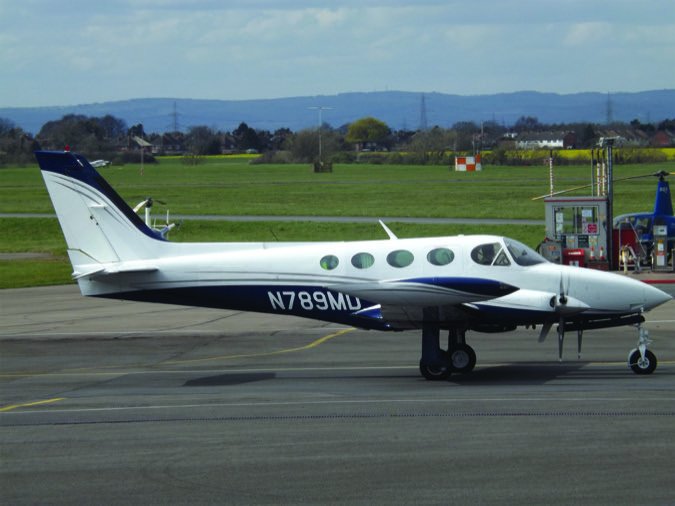
On December 24, 2017, at 07:17 Eastern time, a Cessna 340 like the one at right impacted terrain during takeoff from the Bartow (Fla.) Municipal Airport. According to the NTSB, “The private pilot and four passengers were fatally injured and the airplane was destroyed.” Instrument conditions prevailed; an IFR flight plan had been filed, with Key West, Fla., as the destination.
At about 0630, the pilot asked the FBO to tow the airplane from its hangar to the ramp, “because he didn’t want to taxi next to the other hangars with the reduced visibility due to the dense fog. The five occupants boarded the plane inside the hangar and remained inside the airplane during the tow. The pilot then very slowly taxied the airplane from the ramp to the end of Runway 9L where the engine run-up was completed.” The employees then heard the airplane take off, followed by an explosion. Another witness “heard a ‘pop’ and three seconds later heard the explosion near the end of Runway 9L.”
As this issue was being finalized, the NTSB’s information on this accident remained preliminary. When a probable cause is determined, we’ll publish it.
Tom Turner is a CFII-MEI who frequently writes and lectures on aviation safety.


