
Paul Sanchez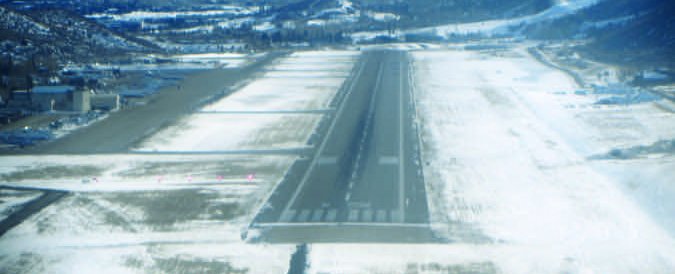
Stabilized approaches have gotten a lot attention lately, not only with those who fly airplanes, but also with the general public. The proliferation of video cameras has done quite a good job of educating people on how an otherwise airworthy aircraft can be flown into the ground. As the images play out on the screen, a disembodied voice inevitably will at some point attribute the carnage to an approach that was not stabilized.
While the voice might not mention just what that thing that was lacking in said accident really is, people will at least remember the phrase the same way they remember words such as shark, fire, disco or myocardial infarction. The true meaning is vague, but they do know it is usually associated with something bad. With that in mind, let’s add some clarity by reviewing what a stabilized approach is. Perhaps if we understand what it is, we can then fly it.
Definition
The standard FAA definition: “A stabilized approach is one in which the pilot establishes and maintains a constant angle glidepath towards a predetermined point on the landing runway. It is based on the pilot’s judgment of certain visual clues, and depends on the maintenance of a constant final descent airspeed and configuration.” This definition is readily understood by pilots who have spent time flying visual approaches. However, those new to aviation can read the words and recognize the objects and subjects of each sentence, but the real meaning of what is being said still can elude them.
To me, that is one of the most interesting aspects of aviation: Much of it can be learned by reading a book and sitting in a classroom, but eventually the head knowledge gained must become experiential to be truly understood. Do a search for books on Amazon using the words “art of flying” as your criteria and you’ll begin to understand how many authors and readers view the mixing of head knowledge and physical manipulation of flying controls as an expression of something beautiful to behold.
But to better understand how an approach is flown in a stabilized manner, let’s look at the easy parts first. The easy parts involve airspeed, descent rate and power-setting portions of the equation.
Airspeed
For the general run-of-the-mill visual approach, an airspeed of 1.3 VSO is recommended. (If you are new to this—i.e., haven’t caught up with your book learning, just insert a blank stare here.) The term “VSO,” of course, refers to the airspeed at which the airplane will stall in the landing configuration.
So if you are configured to land, which usually means gear and flaps down with the throttle set at idle power, the speed at which the aircraft will stall will be found at the bottom of the white arc on your airspeed indicator. Fly slower than that without power and the airplane typically will stall.
The 1.3 portion of the approach speed refers to that buffer above stall. For example, hop into a typical training aircraft and look at the airspeed indicator. The bottom of the white arc is at 46 knots. A little math will show that 46 * 1.3 = 60. This means we will fly our approach at 60 KIAS, giving us a 14-knot buffer above VSO. This should keep us away from stalling and provide us with enough energy to raise the nose to flare and stop the descent when landing without the excessive speed that would cause us to float and possibly run off the end of the runway.
Descent Angle and Rate
That was easy, but what about the other parts of the equation? What about the descent rate and power? We can fly at 60 KIAS all day long—well, as long as the fuel holds out—but without a descent rate, we won’t be landing.
You have probably noticed that when discussing a glidepath to a runway, the value most often used to describe it is three degrees. If you check airport directories and instrument approach procedures, you’ll see that number or a slight variation of it. It’ll be used to describe the final approach slope or angle as defined by either some flavor of visual aid like a VASI or PAPI, or the final approach segment of an electronic glidepath associated with an ILS or LPV approach. So we can now take our two variables and compute our descent rate, like this:

If this math is too complicated for you to perform in the cockpit—which it is—you can cheat and use a climb/descent table like the one below.
We now have three parts of the equation: indicated airspeed, desired approach angle and a corresponding descent rate. Now we just need to add the power variable to the equation.
Power
The next time you are flying, head out to your practice area. Once you’re there and have performed your clearing turns, reduce power and slow to your desired approach speed, but keep enough power to maintain your altitude. Remember to trim the aircraft. Once that is done, reduce your power a little and let it start a gentle descent while maintaining the same airspeed. Gently add or remove a little power until your aircraft settles into the desired descent rate. Note the power setting, and perhaps the pitch trim position, and then practice going from level to a descent back to level flight and then back to your desired descent rate while maintaining your airspeed. Congratulations—if your indicated airspeed is close to your true airspeed and there is no wind, then you are flying a stabilized three-degree approach. Easy peasy, lemon squeezy!
Pick A Point
Now comes the more artsy portion of the stabilized approach definition. You’ll need to do all of this while descending toward a predetermined point on the landing runway. When considering that most people can’t hang a picture level when it is on the wall in front of them, how are we to see a constant three-degree angle when it is running around like a free-range chicken somewhere between our airplane and that predetermined spot on the runway? While our eyes and brains might not be able to discern that angle with any great accuracy, they are very capable in seeing movement so the trick will be to use these visual cues to guide us down to the runway.
Flying the Airspeed Indicator
As this article’s main text explains, the bottom of the white arc depicts VSO, the landing-configuration stall speed. As the article also explains, the generally accepted speed to fly for a normal approach is 1.3 times VSO. (For a short-field approach, manufacturers usually recommend 1.2 times VSO.) These are things airplane pilots should know.
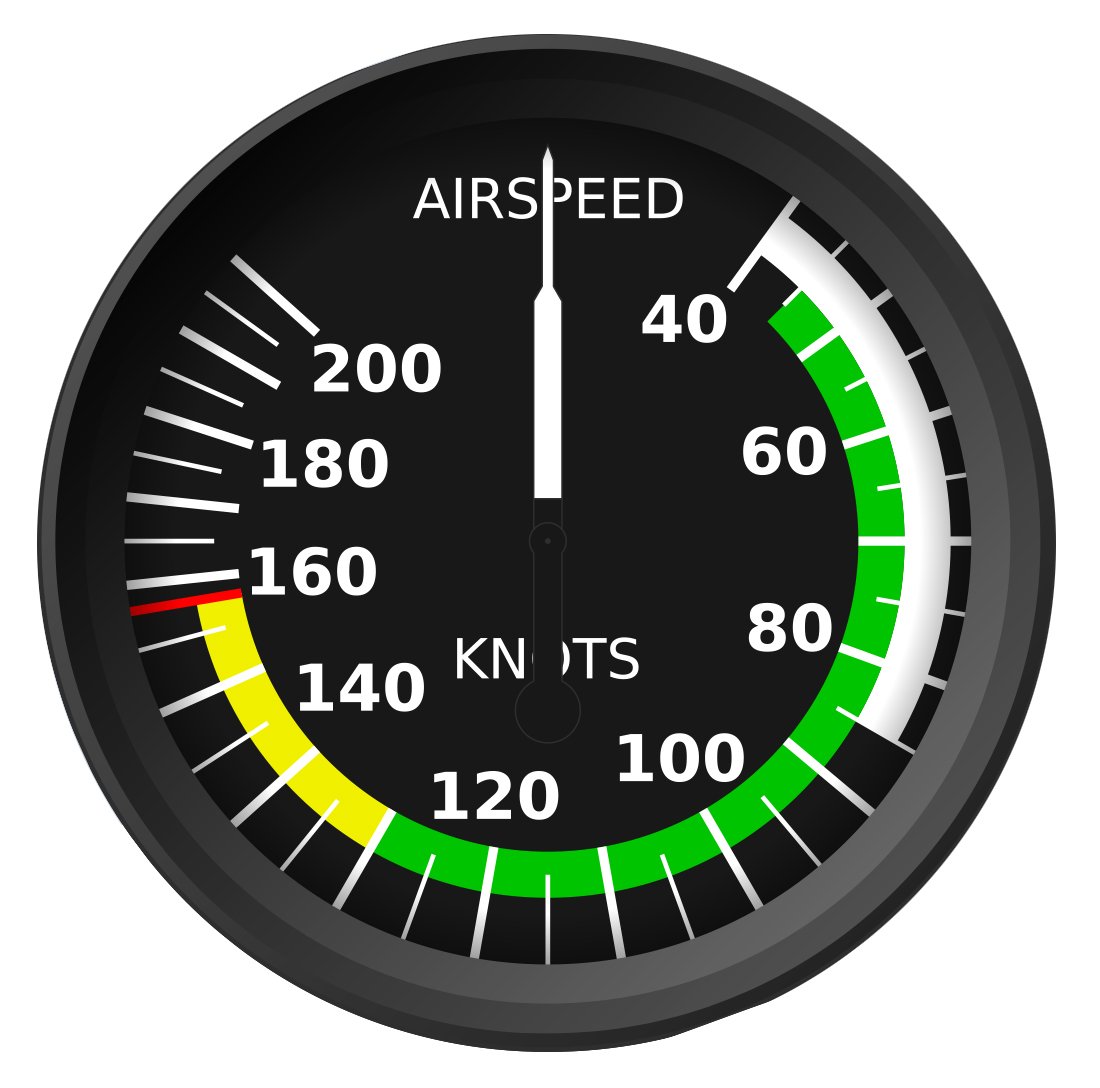
The point is that the proper speed to fly for a normal approach, 1.3 times VSO, is right there on the ASI: Just multiply the speed indicated at the bottom of the white arc by 1.3 and fly the result, which would be 52 KIAS for the ASI markings depicted here. The only time we would want to exceed that value on an approach is in gusty conditions, and then by only half the gust value.
It’s hard to fly a stabilized approach if we don’t know what speed to use. A simple glance at the ASI and a bit of math gives us our target speed. From there, all we have to do is adjust pitch and power to establish it and maintain it.
Picture in the Window
Once established on your final approach (airspeed, descent rate and power are set as we mentioned earlier), look at your intended landing spot and note how high it is sitting above the cowling in front of you. If the distance between your cowling and the spot remains the same, then congratulations—you are on glidepath!
However, if the point starts to move downward toward the cowling, then you are too close for your planned approach parameters to work for you. Reduce power and let your descent rate increase a bit while maintaining your desired airspeed. You should notice that the point will start moving up in the windscreen so that it is higher above the cowling. When it seems about right, return power to that setting that your testing showed was needed for your desired descent rate.
If the point rises above the cowling, you are too low for your planned approach parameters to work for you. In this case, you would add power to slow the descent rate until the point moves back to where you want it and then return to your desired power setting.
By now, you are catching on to why a lot of books include the phrase “the art of flying” in the title. The numbers are important and so is the airmanship to fly those numbers, but developing the ability to see when those numbers aren’t working for you and applying those flying skills in the appropriate way requires that sense of art the writers refer to. Now, go out and do something beautiful in an airplane!
Glenn Grubb has flown Helio Couriers and Pilatus Porters in Indonesia with JAARS, and has some 6000 hours. He’s earned COM/INST/A&P tickets and is deputy director of international aviation safety for JAARS Inc., in Waxhaw, N.C.

