
Performing a magneto check during the before-takeoff checklist is a time-honored task for those of us flying with spark-ignition (gasoline-fueled) piston engines. The idea is to check their health, both individually and by comparing them to each other. The checklists typically call for noting the rpm drop but engine roughness also is something that should be assessed during the procedure
Checking magnetos also can be done in the air, and in many circumstances can pose a tougher test for your ignition system than what the before-takeoff checklist demands. Still, there are some do’s and don’ts, plus some tricks to consider.
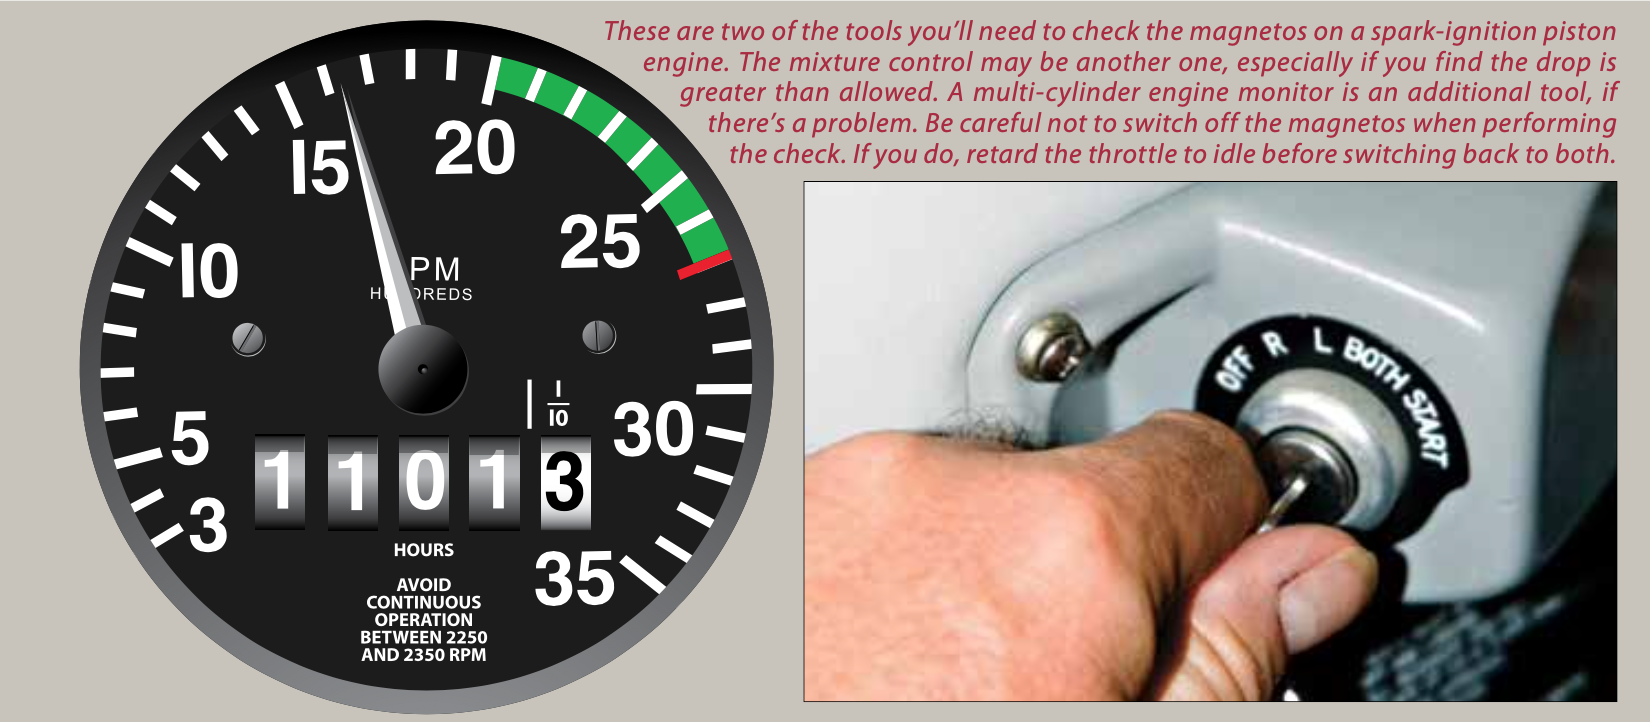
ON THE GROUND
We typically do a mag check in the run-up area adjacent to the runway. Depending on the airplane, you may also be performing other checks before takeoff to verify the airplane and all its systems are performing correctly. This is just one more of them. The basic tools are depicted below: a tachometer and the magneto switch.
Before setting the throttle, position the airplane so the additional propeller blast doesn’t interfere with any structures or other airplanes behind you. The appropriate checklist should specify the rpm to be used; Continental engines typically use 1700 rpm for mag checks while Lycomings use other settings; 1800 or 2000 rpm are typical, depending on the engine. The checklists don’t usually don’t specify a mixture setting, other than “best power,” perhaps. We’ll come back to the mixture control in a moment.
The checklists also typically don’t specify which mag to check first, so we’ve adopted the procedure of first checking the magneto at the switch position closest to “off” first. As depicted below, this means checking the right one first, going back to both for a moment, then checking the left one, then back to both again. This way, if the switch is worn or we’ve mispositioned it, there’s a greater likelihood of being on “both” for takeoff if we only turn it one notch after checking the second mag. Keep in mind that the “R” position grounds the left mag, and vice versa, which is why this switch is arranged as it is.
The objective usually is to note no more than a 150-rpm drop on one mag and no more than a 50-rpm difference between the two. Omitted from the typical manufacturer’s checklist is any mention of engine roughness or other abnormalities. It should go without saying that if an engine runs roughly on one mag, further investigation is warranted, and if there is no rpm drop on a magneto, it’s likely not grounded and is “hot” even with the engine shut down. Have a qualified technician resolve the problem.
If the 150 rpm total/50 rpm split is not what you see, all is not lost, unless one of them fails completely and the engine starts to wind down. If that does happen, it’s best to retard the throttle to idle before turning the switch back to both. Raw fuel can accumulate in the exhaust system, setting off a backfire at partial throttle when spark is restored.
If you have a multi-probe engine monitor, it can tell you much more than the tachometer when performing the magneto check. Normal operation is indicated by an EGT rise among all cylinders when on one mag. That’s because the combustion event occurs more slowly on one mag, and it continues into the exhaust system, where the EGT probe is mounted. If one (or more) cylinder’s EGT drops, note the cylinder and the magneto. That spark plug may need attention.
Presuming one or both mags drops further than the spec allows, probably accompanied by roughness, there are a couple of tricks you can try. First is to lean the engine slowly to a slight roughness on both mags, then let it run this way for a minute or so. This will increase the heat produced in the combustion process, with the idea of burning off the oil or lead that may be fouling a spark plug.
Then do the mag check again, without touching the mixture. If you’re living right, it’ll pass. If not, you can sometimes get away with increasing engine rpm, still at the lean mixture setting, for another minute or so, then pull back the throttle to the checklist rpm and try again.
Engines originally designed for 80 octane avgas can be more susceptible to lead fouling than others, even on 100LL fuel. These are typically small-bore engines installed on light singles. Running an older engine with worn rings and weak compressions may result in oil fouling. In both instances, aggressive mixture leaning on the ground, which increases combustion temperatures, can help keep the spark plugs clean.
IN THE AIR
At first, an airborne mag check might sound like tugging on Superman’s cape. However, and presuming they’re performed at relatively high (cruise) power settings, this is definitely when you don’t want to switch back to both immediately if the engine starts to wind down on one mag, again to help prevent a backfire. As you would on the ground when one mag has apparently failed, retard the throttle to idle, then switch back to both, and then slowly restore the previous throttle setting. Yes, you’ll be without engine power for a few seconds, so you should plan to do in-flight mag checks at altitude.
Airborne mag checks can be something of an ignition system torture test, especially if you’re running lean-of-peak EGT (LOP). When running LOP, the leaner mixture, compared to rich-of-peak EGT, places greater demand on the ignition system—the magnetos, the harness and the spark plugs—because the leaner mixture is more difficult to ignite. If there’s an ignition-system problem, it’ll likely show up here before it will during the pre-takeoff mag check.
Just as when using the on-ground procedure, all cylinders should exhibit rising EGT on one mag. If any spark plugs are a problem, they’ll show up with a dropping EGT on the offending cylinder while the others are rising. Presuming the engine passes the in-flight mag check, switch back to both magnetos and motor on.


