
I had just been hired to instruct in the manufacturer’s authorized pilot training program for the Beechcraft Bonanza. Part of my orientation was a check flight with Norm, the lead instructor of Bonanza training (whom I was replacing as he moved up the product line). We were in an older A36 about 4000 feet over Anthony, Kan., when he reached over and pulled the throttle, choking off the Bonanza’s tired, TBO-busting IO-520 engine.
288
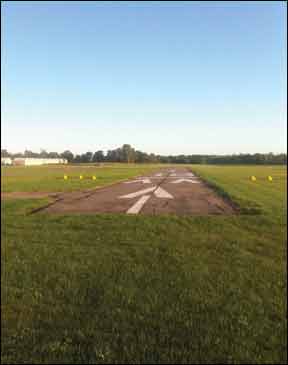
I immediately found the local airport, pointed the Bonanza toward it, and transitioned to a glide as I stepped through the emergency checklist from memory. Norm declared my restart efforts moot, so I pulled the vernier prop control to the low rpm position and committed to a glide. Once over the airport I began my best impersonation of the steep spiral maneuver I’d mastered for my commercial checkride about three years previous, but hadn’t practiced since. My circuits may not have been exactly to the practical test standards, but I did manage to get myself into position on a base leg in a descending turn to final approach, about 600 feet agl and maybe three-quarters of a mile from the runway. Thinking I had the field made, I did what came naturally—I reached over and moved the wheel-shaped switch to extend the landing gear. Not gonna land gear up with my supervisor on board on my first flight in a new job!
As soon as I put out the landing gear I knew I would never make it to the airport. Extending the landing gear created enough additional drag at glide speed to increase the already-steep rate of descent by another 600 feet per minute. My spiral hadn’t been textbook but it had worked…up to the point I configured to land. Norm smiled as he smoothly advanced the propeller control, then the throttle, and instructed me to climb back up and try it again. He probably expected something like that on my first attempt.
“Now you know why so many engine failure accidents happen about a half mile short of the runway,” Norm spoke in his soothing, retired-schoolteacher voice as we climbed. “People think they’ve got it made, and then do something that messes things up.”
Next time around, I delayed extending the landing gear until there was mowed grass just short of the runway under the wings (the early A36 gear extension only takes about seven seconds) and smoothly rolled it on.
From Altitude
The most critical engine failures occur during or shortly after takeoff. The airplane is at low altitude, at a slow speed, and at a high angle of attack. The “surprise factor” that hits a pilot when an engine quits during takeoff or initial climb is dramatic; we’re in a “go-there” mindset and it takes a moment to detect unexpected status, fight off the natural denial that results, and finally do something. But the aerodynamics and techniques of engine failures on takeoff and initial climb, including the ever-controversial discussion of whether it’s a good idea to try to turn around to the airport, are topics for another day.
Instead, most engine failures happen in cruise flight. We spend almost all of our flying time in cruise, so if engine failures are a function of time then it’s logical most of them will occur at altitude. The largest number of in-flight engine failures (in pistons and turbines alike) result from fuel exhaustion or fuel management issues, which usually happen before the pilot makes it to destination (although in a surprising number of mishaps he/she is tantalizingly close). So it’s also more likely for an engine to quit en route than it is because of some mechanical, change-in-rotation-speed-based reason during or just after takeoff.
So, for the purposes of this article, let’s presume we’re discussing engine failures that happen at altitude, in cruise flight. And suppose there’s an airport or other good landing spot beneath or very nearly beneath the airplane when the failure occurs. What’s the best way to descend to this choice landing zone, in a way that ensures you will indeed “make it to the field?”
Steep Spiral
If you’re an U.S.-certificated commercial pilot (or higher), then you know about the practical test standards “steep spiral” maneuver. Starting from an altitude permitting at least three full, 360-degree turns before lining up for final approach, you must remain a constant distance from your identified landing spot as you descend, compensating for wind and not exceeding a commercial-standards steep bank (55 deg. +/- 5 deg.) on the downwind side of each circuit with the wind at your tail.
The idea is to teach (and evaluate) a gliding maneuver, including adjustment for wind drift and keeping it really close to the landing area. Using today’s concept of scenario-based training, imagine you were flying a commercial airplane at night in the late 1940s and lost an engine. You fire off a then-required-for-commercial-night-flight parachute flare to see the ground, and spiral down to remain over the flare’s cone of light. Flown to practical test standards, a steep spiral is meant to be that tight.
The maneuver itself is a constant gliding turn, the steepest bank of which will not exceed 60 degrees. It’s obvious, but always needs to be stated: Sufficient altitude must be obtained before starting it so the spiral may be continued through a series of at least three 360-degree turns. The steep spiral should not be continued below 1000 feet agl unless performing a landing in conjunction with the spiral. Constant airspeed—best glide—should be maintained throughout the maneuver.
Performing the maneuver well demands accurate airspeed control, understanding and correction of wind drift, proper planning and orientation, and division of attention. Things to watch for in performing the steep spiral include poor coordination—resulting in skidding and/or slipping—and failure to coordinate the flight controls so no increase or decrease in airspeed results when straight glide is resumed. Ideally, the maneuver inscribe a perfect circle over the ground, until arriving at the lower key point, a position from which the should be able to glide to the selected field.
Descending Glide
Yes, mastering the commercial-standards’ steep spiral shows a high degree of airplane control and the pilot’s ability to predict performance and make adjustments for changing conditions. There’s no question an advanced pilot needs to have that level of airplane mastery. But if my engine quits in cruise and I’m unable to get it started again, I’d probably prefer to glide down with a little less than steep-bank turns on the downwind side, if I can avoid it. Just as maintaining proficiency with the steep spiral is a good idea, so is a little practice now and then with a more sedate, engine-out glide to know what you’d be up against in the unhappy event of an engine failure.
My descending glide differs from the steep spiral only in that the bank angles are less, and consequently the radius of each turn around the airport is greater. I prefer to hold maximum bank angle to no more than 30 degrees, if possible. As I descend, however, I can judge at all times whether the landing zone remains within gliding distance and, if needed, tighten up or loosen up the bank to get closer to whatever passes for my runway.
An essential component of planning this descent is knowing how much altitude you’ll lose in each circuit around your field. At best glide in least-drag configuration at fairly light weights in the A36 Bonanzas I most routinely fly, I’ll lose about 1000 fpm in straight-ahead flight and about 1200 fpm while in a standard-rate gliding turn (a hair less than a 20-deg. bank at glide speed). Call it 2400 feet for every full circle above the airport, or about 600 feet for every 90 degrees of turn. If I’m upwind of my landing zone and need to circle to downwind and then to final (180 degrees of turn), I need to be close-in to the runway and at no less than 1200 feet agl, descend continuously, and do everything right, or I’ll never make it.
Flying just a little wider, with room for error and a moment to level the wings on downwind to judge when to make a continuous turn to final, I follow a pattern that is a modification to the FAA’s 360-degree power-off approach. Note the altitudes are a little higher than the math above suggests…it gives a little room for error (hey, we’re all going to be a little stressed at this point) and lets you fly a little more normal-looking pattern than a steep spiral or a very tight, circling approach.
Visualization
When gliding to an emergency landing site, I visualize how I will approach and fly the pattern. I want the airplane to arrive at the key positions at the appropriate altitude and use S-turning, slipping or advancing the propeller control momentarily to serve as a speed brake, if needed, to meet those goals. From there, I make a continuous gliding turn as needed until I slow to engine-out landing speed (see the sidebar above) on short final.
As the diagram on page 17 describes, the downwind key is a point 1500 feet above the field and abeam my planned touchdown point. This is higher than a typical downwind leg because the rate of descent in a glide will be greater than in a normal approach with power.
Base key is 1000 feet above field elevation and three-quarters of a mile from the touchdown spot. This is a high, tight approach compared to what most pilots normally fly. Flying approaches closer to the runway in your everyday flying under normal operations will help prepare you for the possibility of an engine-out glide to a landing.
The straight-in key is 800 feet above the field and one mile from touchdown. If you fly a downwind or base key entry, you’ll turn inside the straight-in key instead of flying over it. If I’m high above the airport or my selected field when the engine quits, I’d spiral down to high key, which is 2500 feet above the airport. From there, make a standard-rate-to-medium-bank gliding turn to base key, then continue on to landing.
Some pilots of retractable gear airplanes advocate extending the landing gear at the high key or downwind key position to avoid the need for a descent-rate change (or forgetting the landing gear) on final approach. This will naturally increase the rate of descent significantly, and require new, higher altitudes for each key position. With a little practice, a pilot wanting to use this technique will know what altitudes he or she needs when passing over each key position.
Successfully handling a cruise-flight engine failure requires executing a plan to get the airplane safely onto the best landing area available. To execute that plan you need to first know what it is, so spend some time thinking about engine-out glide techniques, and include gliding practice in your next dual instructional session or required flight review. With the right plan, and a little practice, you’ll nail the final key position every time. And that’s what it’s all about.
Tom Turner is a CFII-MEI who frequently writes and lectures on aviation safety.


