
The first time a pilot on an ILS approach sneaks under the glide-slope is almost always a situation where he is on an ILS final, approaching minimums. Hes close to decision height and suddenly there are patches of ground appearing intermittently below. An instant later, the strobes are visible. He drops below the glide path and the runway is straight ahead. The pilot later realizes that remaining on glide slope at decision height would have meant executing a missed approach and possibly a trip to the alternate airport.
On the next gamble, he descends a little bit more below the glideslope path – and it works again. In fact it may work a number of times. The best estimates indicate that highly experienced pilots – often professionals – are more likely to be involved in a sneak-under-the-glideslope accident than low-time instrument pilots.
Sneak-under maneuvers can produce high sink rates and thrust/lift problems at low altitude, so it may be only a matter of time until the worst-case scenario happens. The last few hundred feet of the approach requires the greatest amount of concentration and discipline. The pressures mount to the point that many pilots are extremely reluctant to even think missed approach.
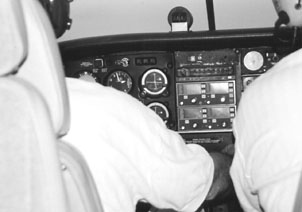
The precision of the ILS is one thing that makes pilots think they can continue to fly the approach course all the way to the runway, despite not having the runway environment in sight at decision height. The systems accuracy is amazing, even in these days of close-tolerance avionics. The ILS is easy to use, with very clear instrument readings.
Unfortunately, many instrument-rated pilots – even some high-time professionals – dont get the most out of the system. They cant consistently get locked onto excellent ILS approaches. Sometimes the techniques used while flying the ILS approach are at the root of the problem. Other times they are victimized by the quirks in how the system operates.
Approach Transition
A good ILS approach begins long before the glideslope and localizer needles center. Poorly executed approaches generally start to come apart in the transition phase due to mistakes the pilot makes at that point. The solution to the problem starts with knowing how the airplane will get into position to fly the localizer.
The localizer provides the course guidance needed to align the aircraft with the runway centerline. The localizer antenna is located at the far end of the instrument runway.
Because the localizer does not give bearing information, the ILS course indicator wont point right at the localizer unless you happen to be on the extended centerline. This is where the transition phase comes in.
You need to know how to transition to the localizer final approach course – generally radar vector, DME arc, transition fix, procedure turn or holding pattern. That means you must know your aircrafts position relative to the inbound localizer course. Know the angle that the aircraft is approaching the localizer course and the distance to the localizer course. Anticipate what instrument indications to expect and when to expect them.
If you get behind the airplane during the transition phase, it can be very difficult to catch up during the rapid intermediate and final phases of the approach. One of the biggest problems in training pilots to move from prop planes to jets is to get them to think further ahead. An experienced jet pilot doesnt spend much time on what he is doing while climbing to the assigned altitude. Hes asking himself what the next task hell be expected to do is and what the parameters are for that task.
Early in the transition phase, you slow the aircraft to the low-altitude maneuvering airspeed. Whats next? The before-landing checklist needs to be accomplished and the aircraft configuration modified as required. Whats next? The pilot needs to be aware of his intercept angle – preferably between 30 and 45 degrees – to avoid overshooting.
Dont make a long, shaky intercept that puts the aircraft at or beyond the final approach fix. Intercept the localizer course positively and smoothly, followed by a precise turn to a heading that will lock onto the localizer final approach course.
If you dont slow the airplane enough to get gear and flaps down, or you somehow end up on an impossible intercept angle, it will certainly result in a final approach course overshoot. Things rapidly get worse. Trying to slow the airplane while also trying to capture the localizer is the start of an unstabilized ILS approach.
If you can maintain an altitude, heading and airspeed, thats all that you need to produce straight and level unaccelerated flight. The pitch attitude control maintains and corrects altitude. Power establishes and maintains airspeed.
To hold on to the desired heading or to make small corrections is simple. A good rule of thumb is to bank the number of degrees needed to turn the aircraft. Exactly on course means a bank of zero, while 10 degrees off means a bank of 10 degrees on the attitude indicator.
And then there are the dancing needles. When you select a localizer frequency, the CDI becomes much more sensitive than it was as a VOR indicator. Since the localizer course is only about 5 degrees wide, the needle displacements are larger and the needle moves much more rapidly. The other main difference is that the omni bearing selector no longer affects the operation of the needles.
Even though the OBS selector is inoperative, it can be set on the localizer course to remind you of the track you are going to follow on the localizer final approach. Some pilots dial in the desired heading with the crosswind figured in, to help them remember the correction and to provide a check for crosswinds that become unexpectedly strong.
During the transition phase, accomplish as much of the final checklist as possible, usually right up to flap and landing gear extension. You should also be familiar with all the details on the approach plate – particularly the missed approach procedure.
Sometimes, however, you never get from the transition to those magical words cleared for the approach. Before you lock onto the ILS localizer, ATC has a few problems with traffic and the dreaded clearance comes through to the pilot – holding ahead.
One easy way to enter the hold is to draw the holding radial on your enroute chart. Then draw a 70-degree diagonal. Locate yourself and pick the appropriate AIM-recommended entry. Then its either a right or left hand holding pattern.
Another method depends, as the others do, on the direction which you approach the station. If your course to the station is within 45 degrees of the inbound holding course, consider your aircraft to be more or less established in the holding pattern. After station passage, turn toward the holding side to the reciprocal of the inbound holding course.
If your course is more than 45 degrees from the inbound holding course, turn in the shortest direction to the reciprocal of the inbound holding course. Maintain the heading for one or two minutes, then turn in the shortest direction – as indicated by the OBS – to return to the station.
While the textbooks beg to differ, ATC is really just interested in you maintaining altitude and staying within a reasonable distance of the fix. Then its around in circles until youre cleared to continue on your way.
Radar Transition
Radar vectors are the easiest way to transition to the ILS, but surprisingly many pilots have problems with this method. The pilot takes up a heading and altitude and waits for the next event or instruction to come up. When the airplane is on what amounts to a downwind vector with ATC, you may notice that the localizer and glideslope needles are fully deflected and suddenly wonder where you are. You have lost your mental picture of what the controller is trying to do.
Usually the controller is trying to get the airplane vectored to a base leg or final approach on the localizer. Some pilots on the base leg get blindsided when they are cleared to an intercept heading and given an altitude to maintain until established on the localizer. Things begin to come apart rapidly.
They acknowledge the vector and the approach clearance, then shoot through the final approach course. Before they get established on the localizer again, they may continue descending. Sometimes the pilot, having missed the localizer from a base leg vector and with a fly up indication on the glideslope, starts a descent toward decision height – miles from the runway. Sometimes an alert tower controller issues a low-altitude alert. Sometimes not.
Another way to foul up the approach is to make a panicky effort to get everything on the checklist accomplished before you pass the outer marker. Centering the localizer and glide slope needles at the same time is more trouble than you would guess. This one doesnt often work.
The Intermediate Phase
Once you are established on the localizer course, the best that can happen is that the airplane is in the correct configuration when you arrive at the final approach fix. Youre at the correct glideslope intercept altitude, at the proper final approach speed, and with desired flaps and landing gear extended. The power settings are where you want them and the pitch attitude is correct.
Note that the ILS final approach fix is not always at the outer marker. Sometimes pilots can get confused when the final approach fix is located at the point where the initial approach altitude intercepts the glide path some distance outside of the outer marker.
Unless otherwise specified on the approach plate, the final approach descent begins at the final approach fix. If you wait for the outer marker before beginning your descent, you may see the glideslope indicator needle go from full fly up to a 1 fly down. At that point, you can either fly the rest of the approach with an indication of fly down or somehow attempt to recapture the glideslope.
Capturing the glideslope on the descent can lead to yo-yoing all the way to decision height. If you cant immediately capture the glideslope, you may want to consider abandoning the erratic approach, declaring a missed approach and trying again.
In the best of situations, you will intercept the localizer well above the published final approach fix altitude. You can then intercept the glide path and fly right down to the final approach fix. This way the aircraft arrives over the fix in the required configuration and at the proper altitude. This makes for an easy transition – with little or no change – to the final approach.
The Final Approach
Now you are at the most critical phase – the final approach. Here is where the approach will either come together or fall apart. It does call for the most precise flying, but if the approach has been correct so far, the final approach is easy to fly.
You need to anticipate that the glideslope indicator needle will be coming from the full fly up position, down toward the on glide path indication. Depending on the speed of the aircraft, the needle movement can be rapid. Even if you note large scale deflections of the course and glideslope needles, there is no cause for extreme alarm. The large vertical or lateral deviations are generally caused by the instruments becoming more sensitive as the aircraft approaches the transmitting antenna.
In the vicinity of the final approach fix, errors magnify. A one-dot off reading shown on the course deviation indicator is 838 feet off the final approach course from five miles out, but the same dot represents 308 feet one mile from the runway. On the glideslope, one dot off will mean a 130-foot vertical error from five miles, but only 26 feet from one mile.
If you need to make heading changes, use a maximum of five degrees correction. Limit pitch adjustment to just two degrees.
The primary error that rusty pilots demonstrate in low weather is in handling the power. If ceilings and visibility are low, youll have very little time to transition to visual contact for landing. Sometimes youll see just a flash of the approach and runway lights, and the runway comes into view.
A pilot who needs work on proficiency will almost always reduce the power rapidly and dive for the runway. This is an extreme change in the airplanes configuration and attitude. Up to this point, the approach has been relatively shallow, carrying higher than normal power to hold the airspeed.
Remember that a typical visual approach will involve a four to five degree glide path, while an ILS is usually three degrees. Normal visual landings are made with a steeper approach and less power on final.
As the aircraft nears the decision height, you must increase your scan rate. The altimeter becomes very important and you must add a quick glance out the window for the runway environment. As you transition from instrument to visual flight, there are three important things to be aware of. The touchdown point is 750 feet to 1,500 feet from the approach end of the runway. The glideslope transmitter is located at least 750 feet from the approach end of the runway. If you maintain the proper glide path, you will cross the threshold high. In rain or fog, youll think youre even higher.
The most common mistake most pilots make near decision height is overcorrecting. Remember that when youre this close, even large deviations in the needles are very small in physical distance.
From the final approach fix to the missed approach point, do not allow the aircraft to get below the glide path. This is the catastrophic zone. The FAA criteria for designing instrument approaches allows the glideslope to be as low as 92 feet above obstacles at a point 3,000 feet from touchdown. If you consider acceptable altimeter calibration error, the margin shrinks further.
The Missed Approach
There are a number of difficult points in any IFR approach, certainly depending on the pilots skill level. The most difficult is undoubtedly the missed approach. Everything seems to be going well, the ILS approach is on greased rails, the approach lights are due any second. Whoa! The middle marker is flashing and sounding and there is no runway environment in sight.
You are at decision height over the end of the runway. The before-landing checklist has been completed and the gear and flaps are extended. But the windshield is painted over in gray, with streaks of moisture running from bottom to top. Whats next? Full throttle, regain airspeed, gear up, flaps up, climb set.
The pilot is somewhat stunned. What went wrong? Dont know, but now its missed approach time.
Pilots from professionals to rank amateurs have come to grief when they tangled with a missed approach procedure they never thought they would use. Usually its due to not planning ahead. Any pilot who isnt prepared for the possibility that decision height will not reveal the runway environment is going to be under some serious mental stress.
The two choices: gamble by either waiting a few more seconds or descending below minimums, or execute the missed approach. Its all tied up with the decision height when you make an ILS approach.
A decision must be made either to miss the approach or land. This decision does not come at a time or physical place, like the runway end; it comes at a published altitude. Once you reach the DH on a precision approach, you must make a missed approach if a safe visual landing isnt possible from the missed approach point.
Heres another caution: If you decide to execute a missed approach before reaching the MAP or the DH, advise ATC. Then fly the instrument procedure to the MAP at an altitude at or above the MDA or DH before executing a turning maneuver. Once you inform ATC that a missed approach is being executed, theyll issue radar vectors that will supersede the previous missed approach instructions.
The next trick in the missed approach is to execute it with minimum altitude loss. Its a good idea to hone your IFR skills with a good instructor from time to time so youll be sharp if you need it for real. Practice approaches down to the decision height and the MAP. Get comfortable with the missed approach.
If you really want to use your IFR skills, its going to take practice and more practice. Youll need to get criticism of your missed approach technique, and then correct the errors. A lot of trouble? It is. But if you are going to be a safe IFR pilot, there isnt any cheap, clean, easy way to get there.
If you opt to execute the missed approach, apply full takeoff power smoothly but without hesitation. Once the airplane has stopped descending, adjust the flaps, raise the landing gear and configure for climb. Once a positive rate of climb is established, adjust the power to the optimal setting, which may not be takeoff power. Select whatever approach frequency youll need to contact and make your call. The missed approach course should already be set in Nav 2.
Scheduled airline pilots flying in the late 1920s didnt need elaborate briefings on weather. They looked out of the operations building window to know if they could fly or not. The weather conditions ruled. Go or no-go decisions were simple. If there was weather, you didnt go.
Aside from the fact that the pilot couldnt see to take off, there was no way to fly en route navigation unless the pilot could see the landmarks, the lights or the ground.
Now every major U.S. airport and even a huge number of small airports use ILS for their primary instrument approaches. New systems are on the horizon, but the ILS will be guiding pilots through weather and darkness for some time to come. Honing the skills to fly the ILS with confidence – and competence – will serve well when the weather goes down and the stakes go up.
Also With This Article
Click here to view “Tricks and Traps.”
Click here to view “Pitch Vs. Power.”
-by Raymond Leis
Raymond Leis is an ATP/CFII and FAA-designated Safety Counselor.


