
When was the last time you planned a flight? No, we dont mean hop in the aircraft and punch direct on the nearest GPS navigator; we mean really planned the flight the good old-fashioned way…with a pencil, a plotter, an E6-B, a sectional and a flight log. Its been a while, hasnt it? At this point, youre probably thinking, “Here
288
comes another really boring article about navigation,” but thats not the case.
Instead, this really is about safety and situational awareness; its about really understanding what is happening when you fly from point A to point B. Finally, its about remembering and utilizing the basic skills of a VFR pilot that may have some rust on them.
Youll recall the three basic forms of navigation: Pilotage, ded reckoning and electronic. (Okay, there also is celestial, but were making the broad assumption that there are not a lot of flight navigators out there.) Each has its own tricks and tips. But the most important lesson is never, ever to rely on just one of them.
Pilotage
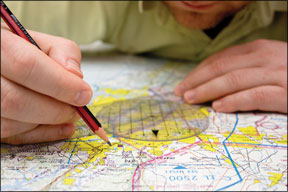
Pilotage is looking outside the aircraft, finding a significant landmark, and then finding yourself in relation to that same landmark on a chart.
Pilotage is one of the oldest forms of navigation and is used by aviators, as well as boaters and hikers. Mountains, hills, lakes and rivers are natural landmarks we can use. Man-made features like railroad tracks, airports, cities and dams are useful landmarks as well.
Ded Reckoning
The term “ded reckoning” (or “dead reckoning,” if you prefer) first appeared in the 1600s. Its another way to say “deductive reasoning,” the process of calculating your position based on a previously known position and then applying (mathematically) all known changes such as speed, winds, etc. In effect, it is saying, if I am at point A and I take 10 steps forward and five steps left and three steps backwards-and each step is exactly three feet-I can determine my exact position.
Pilots often get nervous with ded reckoning. To do it correctly, we must use a plotter and measure our true course on a chart. Then we must use a wind triangle to calculate the effect of the forecast winds aloft. At the same time, we must account for the performance of the airplane during its climb, cruise and descent. If we have done everything correctly and the forecasts are accurate, we should be able to take off, fly the compass and clock, and arrive exactly where we need to be.
Electronic Navigation
This is probably the easiest form of navigation. Flying from one VOR to another along an airway has been the most common form of electronic navigation. With GPS or Loran equipment, we simply plug in the destination and hit the direct key. Thats about as electronic-and easy-as it gets.
Of course, we all know and remember that portable GPS units are only for situational awareness. Theyre not certified by the FAA for primary navigation, even VFR. Make sure you dont arrive at an airport with all your navigation gear inoperative except for your portable, and face an FAA ramp check.
Practical Application
Now that we are experts on the three basic forms of navigation, its time to put this newfound knowledge to use. We (the photographer and me) decided to plan a flight that would be at least an hour in length, would not depend to any great extent on electronic navigation, and would allow us to exercise both our ded reckoning and pilotage skills. And, of course, the destination had to have a restaurant to nourish us after having expended so much mental energy.
Our flight will take us from Livermore, Calif., to Porterville, Calif., a distance of approximately 165 nm. Our airplane is a 1982 Cessna TR182. For this article, we are limiting ourselves to 5500 msl. We have divided the flight into five separate legs, each of which is just over 30 nm. With a TAS of about 150 knots, that should give us about 12-14 minutes between checkpoints, enough to log all of the important information and take some photos.
Our first leg will take us from Livermore to Crows Landing, an abandoned NASA landing facility. We then will proceed to Santa Rita Park, which lies along Highway 152. We anticipate that this will be a tough checkpoint to find since it is not clear exactly what Santa Rita Park is, but its along our route so it gets the nod. Then on to Kerman, Calif., to Hanford and to Porterville. Neither myself nor my copilot/photographer were familiar with any of these landmarks.
The Nitty Gritty
The first real task is determining each legs true course. Why true course? You need to know the true course to apply the forecast winds aloft to your plan. We mark the course line on a chart and use the plotter to tell us the exact true course.
Once all the legs and true courses are recorded, its time to calculate leg length, using the correct side of the plotter. Yes, there are two sides: one for WAC charts and one for sectionals. Use the wrong side and you will either get there a lot quicker than you planned-or you could end up in a nasty fuel situation.
At this point, each checkpoint should be in the log along with its true course and altitude. You should also have the distance column filled out and, as you can see, this flight is approximately 167 nautical miles in length. We are pretty much done with the sectional (for now) and must turn our attention to the performance sections of the aircraft flight manual.
Be sure to check thoroughly for notes or fine print in your AFM when youre looking at your time-to-climb or cruise performance charts. Since our climb speed is different than our cruise speed, we need to take that into account. And, this being summer, we must increase the time, fuel and distance by 10 percent for each eight degrees F above standard. In the summer, that can be significant.
Now that we know it should take us approximately eight minutes to climb to 5500 MSL (you did remember to subtract the airport elevation to compensate, right?) at 95 KIAS, we can use the forecast temperature aloft to find our true airspeed in the climb.
Once we have figured out our climb TAS, we can calculate our estimated climb ground speed based on forecast winds aloft. Some pilots (like us) will actually use a separate line on the flight plan for the climb section so that they can note how long it actually took. And, of course, dont forget the calibrated airspeed calibration check.
The Wind Triangle And More
But wait, were getting ahead of ourselves. What about the winds? Winds and temperatures aloft are the elixir we need to really perform the ded reckoning magic. We use the wind direction and velocity to calculate our heading information. Then, its back to the AFM for the planned en route cruise TAS and fuel burn. We use both to predict the heading we will need to fly and the amount of time it will take to get to each checkpoint.
The winds aloft triangle (on the back of the E6-B) is all done by referencing true course and true heading. We use the winds aloft to calculate our wind correction angle and apply it to the true course to arrive at the true heading. Next, we apply magnetic variation by referring to the dashed magenta line on the sectional nearest to our planned course. On the West coast, these are always negative numbers and we need to subtract approximately 15 degrees from the true heading. This gives us the planned magnetic heading.
Hang on, were almost there. Remember the compass deviation card? We add or subtract the compass correction number from the magnetic heading (usually only one or two degrees) and that gives us our course heading. It is the course heading (finally) that we will follow during the flight.
Of course, we used a standard flight planning form (the actual form we used is reproduced on page 13) to keep it all straight. As we continue across the form, youll note the groundspeed is an estimate and there is a spot for the actual recorded ground speed. You should enter your estimated groundspeed you calculated from performing the wind triangle. You also should enter the estimated time en route, the estimated time of arrival, the actual time en route and the actual time of arrival. You can calculate these estimates from the circular slide rule side of the E6-B. By doing this, you keep very close track of your actual performance and will be constantly refining your estimates and the accuracy of your flying.
Aftermath
We learned a few things along the way. Clearly, airports make the best checkpoints. They are very easy to spot even from some distance away. The second best are isolated cities, large natural features (e.g., dry lake beds) or highway intersections. Kerman, in the middle of nowhere, is an example of this. Santa Rita Park proved to be the most difficult of checkpoints to find. As a flight planning checkpoint, it wasnt worth much. The other lessons we learned are summarized in the sidebar above.
Phil Blank holds Airline Transport, Flight Engineer and Flight Instructor certificates. He is type-rated in several jets.


