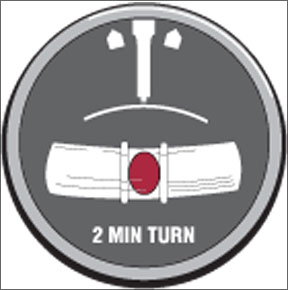
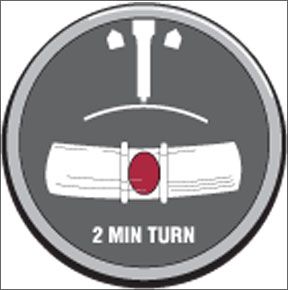
A close friend e-mailed recently to inquire about what happens to the turn coordinator/turn and bank instruments ball in certain flight attitudes. After giving him what I thought was the answer he needed, several more e-mails ensued, each one raising my frustration level-admittedly not a difficult thing to do. Finally, I picked up the phone and called, and Im glad I did, since his real question had very little to do with the ball. But his questions-and little bit of research I did to verify my understandings before responding-highlighted one thing: There probably are a large number of pilots out there who have forgotten exactly what the little ball does and how it does it. 288 Theres also another number of pilots who never were taught these things correctly. Lets try to fix both problems. First, though, lets refresh our understanding of why and how an airplane turns. Turning 101 With conventional airplanes, turning from one heading to another is a matter of altering the amount of lift the individual wings produce and changing its direction. Youll remember that, while in straight-and-level flight, the wings vertical lift component is at its maximum for the airspeed and angle of attack while the horizontal component is zero. To turn, we need to change the direction in which lift is produced. This is accomplished by entering a bank, which raises one wing and lowers the other. In most airplanes, a bank is entered when we lower the aileron on the wing we want to raise, increasing the lift it produces and forcing the wing up. At the same time, the other wings aileron is raised, decreasing the lift its producing and forcing it down. As one result, the fundamental bank is established. As that bank is established, the horizontal lift component increases while the vertical component decreases and the airplane begins to turn. But theres no free lunch in aerodynamics. By creating additional lift on the raised wing, weve also increased its induced drag, which has the effect of yawing the airplane in its direction. The amount of yaw produced depends on the wing and aileron design. Thats because the longer the wing, the further away from the airplanes vertical axis is the aileron. Presuming identical ailerons and identical deflection, the aileron on a long wing creates a greater yawing moment than one on a short wing. The yaw-often termed adverse yaw, because it acts opposite to our desire to change heading-is countered by applying rudder in the direction of the turn. Done correctly, this rudder input negates the raised ailerons adverse yaw by adding yawing moment in the direction of the turn. When flown by an experienced pilot, all of this happens seamlessly and effortlessly; an uninformed bystander wouldnt notice it. Measuring the Turn Of course, a turn has various qualities and quantities, including bank angle and rate of heading change. Heading change is displayed on a directional gyro, if you have one, while bank angle is presented on the artificial horizon, again presuming your airplane is equipped with one. Without one or both of these instruments, were left to guesstimate these values by referencing the natural horizon or compass. Both of these variables-rate of heading change and bank angle-could be thought of as quantitative: A given turn has x degrees of bank and y degrees of heading change per second, for example. Meanwhile, the quality of the turn-the accuracy with which the desired heading change is achieved and the extent to which adverse yaw is minimized-is determined at least in part by another instrument in the panel. Enter the turn and bank indicator or the turn coordinator. The sidebar above compares and contrasts these two gyro-driven devices. For simplicitys sake, well simply refer to either of them as the turn instrument, although-because of their differing designs-they are not interchangeable. Regardless of which you have in your panel, both come with an inclinometer-the glass, liquid-filled curved tube with the small ball in it. Together, the ball and the turn instruments presentation help us establish and monitor the turns quality. How The Ball Works The ball basically points down, something confirmed by looking at any turn instrument when the airplanes at rest. The ball will be at the curved tubes bottom, ideally exactly between the two vertical lines or wires, called a “cage.” Gravity is at work here, keeping the ball centered. As we fly the airplane, though, the ball starts reacting to the changing forces exerted. In smooth, straight-and-level flight, it continues to rest in its cage, reacting to gravity. Since theres no force working to displace it, you might think its broken, or not working correctly. But crank the airplane into a bank, in either direction, and things start changing. The balls position now depends on the bank angle and the amount of yaw about the airplanes vertical axis as it responds to the relative strength of gravity versus the centrifugal force generated in the turn. In a turn made at a steep bank angle and without rudder input, gravity is greater than centrifugal force, and the ball is displaced downward in the tube to the inside of the turn. This indicates a rate of heading change that is too little for the established bank. Of course, the opposite also is true: If the turn is made with too shallow a bank angle for the rate of heading change, centrifugal force acting on the airplane is greater than gravity and the ball rolls to the outside of the turn. Meanwhile, when the ball is centered in the cage, centrifugal force and gravity are balanced, indicating the heading change rate is correct for the established bank angle, and vice versa. In no case does the ball indicate the bank angle nor the heading change rate. Instead, it only presents information on the relationship between gravity and centrifugal force, or lateral inertia, if you prefer. Six Ways To Center The Ball If your primary instructor was like mine, in your sleep you may still hear him or her repeating the mantra, “Step on the ball.” Ignore that advice to your airmanship skills peril, because its sound. In fact, the only thing wrong with it is we rarely need to actually add rudder pressure. Instead, we can relax rudder pressure when theres too much of it, or we can change the bank angle. Put all these combinations together and there are six basic ways to center the ball. Lets do the easy, obvious ones first. And, if you plan to actually fly this demonstration, grab an appropriately rated pilot to go with you, since youll have your head down, looking at the flight instruments, and someone always should be looking outside. With the airplane flying straight and level, roll into a left turn, but leave your feet flat on the floor. Depending on the airplane and how steep a bank youve entered, youll probably see the ball in one of the positions pictured at left. In either of these two situations, centering the ball is easy, just as your (and my) instructor decreed: Step on the rudder pedal in the balls position. If youre looking at the T&B instrument at top, youre in a skid; yaw/heading change is too little for the established bank. Gently apply right rudder pressure and the ball will slide into its cage. The same is true for a slip, as depicted by the bottom T&B instrument above, except youll apply some left rudder to center the ball. Thats two. Now, return to straight-and-level flight. Once youre ready, gently roll into another bank, the direction of which is at your discretion. Use coordinated control inputs to simultaneously deflect the ailerons and apply a small amount of rudder pressure. Were actually going to make this a rather steep bank of, say, 45 degrees, so dont relax the aileron input yet. Just a little bit of rudder here, though. If youve done this as were describing it, youve established a moderately steep bank, with very little accompanying rudder. The result is a rather steeply banked slipping turn, since-remember-a slip is a turn with insufficient yaw for the bank. But rather than add rudder pressure, maintain it and relax some of the aileron input and roll to a shallower bank without leveling the wings. Stop when youve centered the ball without any additional rudder input. We can do this the other way, too. From straight-and-level, gently add some rudder, without any aileron input. The ball will slide out to the side opposite your rudder input. Now, holding that rudder input, gently apply some aileron in the same direction. Soon, youll have established a steep enough bank to center the ball. Instead of using the rudder to center the ball, youre using aileron. This demonstrates the interdependence of bank angle and yaw rate. Thats four. Finally, lets demonstrate the last two ways to center the ball. Again, from straight-and-level flight, roll into a 45-degree-banked turn. Add plenty of rudder in the turns direction. The ball should indicate a slip. Now, begin decreasing rudder pressure and relax some of the aileron input (you may have to apply opposite aileron). Coordinate the control pressures so you arrive at approximately a 30-degree banked turn with the ball centered. This demonstrates how we can use coordinated rudder and aileron input-the relative amounts of which determine if youre centering the ball with more rudder or more aileron-but youre still using both controls. Those are the fifth and sixth ways to center the ball. Having a Ball Flying the ball used to be one of the few things I disliked about flying. After many years, I finally understand it all, and especially the relationships between bank angle, yaw and rate of turn. Most of the time, were flying straight and level. But when we turn, and if we want to maintain coordinated flight, we need to know where the ball is, how it got there and how to get it back.


